
Inspecting Help article
Create Performance Review
A Performance Review turns a finished inspection into a report you can send to your customer. This shows you how to complete the inspection in CleanGuru, choose what goes in the report, and email it out.
Complete the Inspection
Check the inspection status
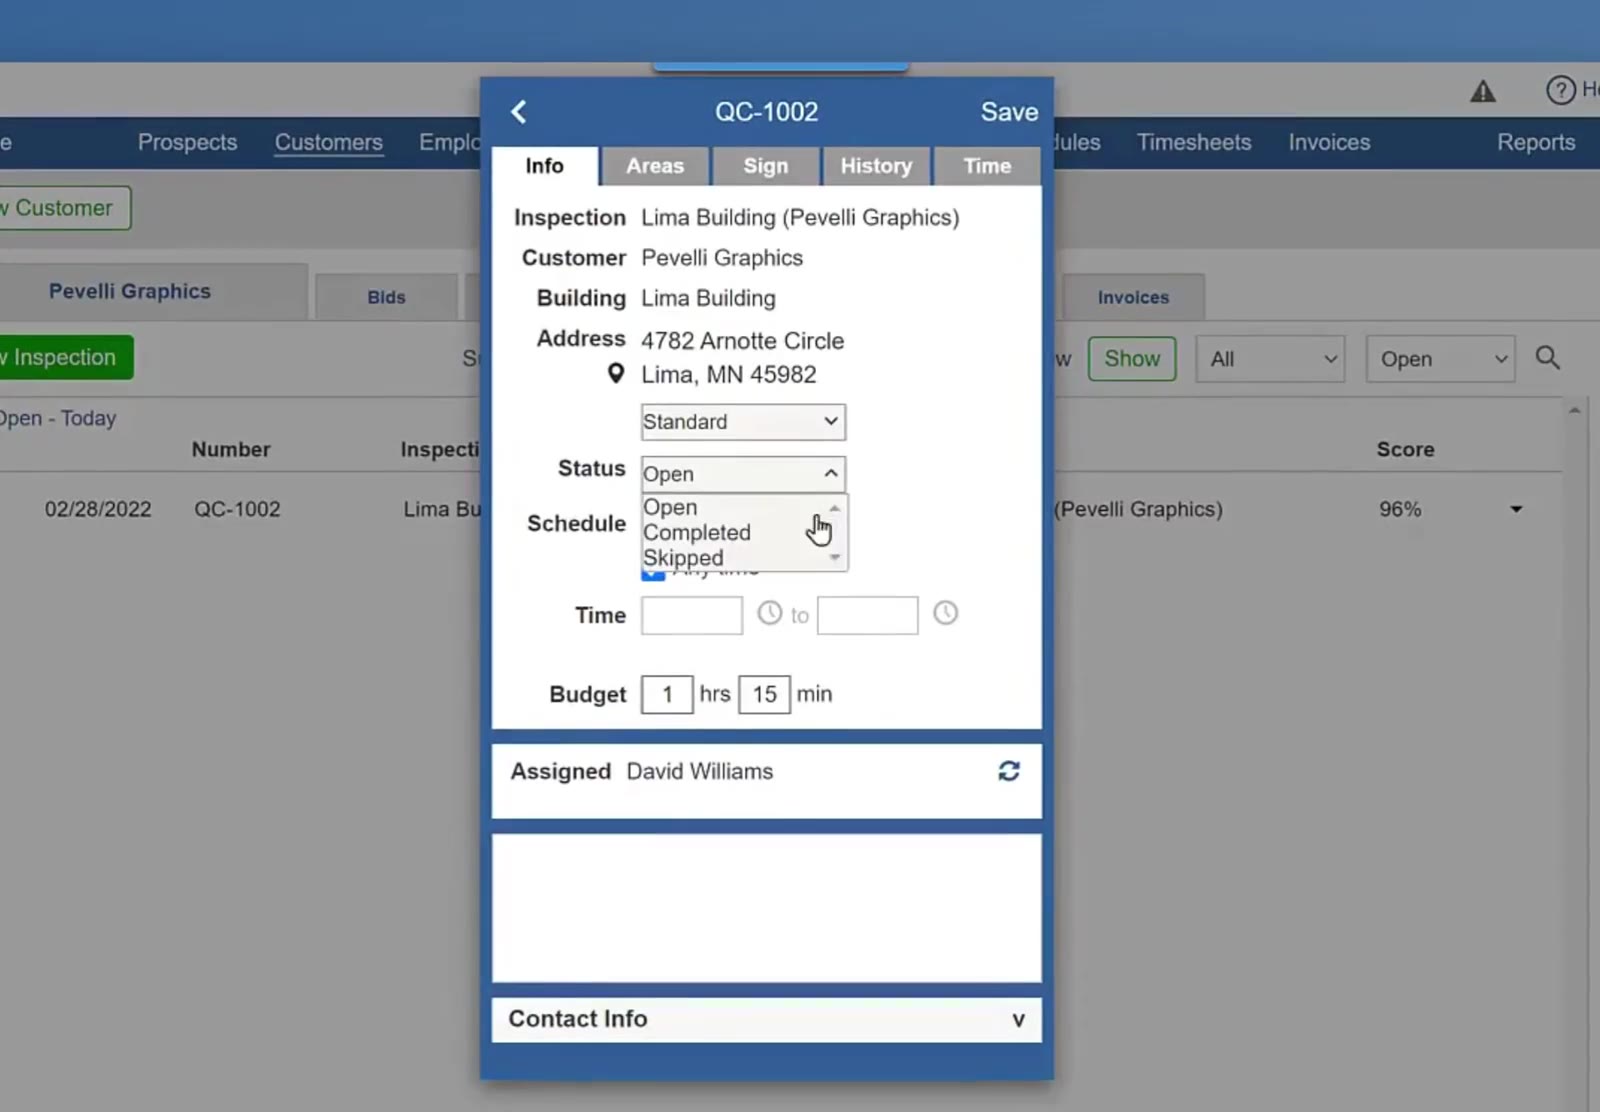
Open the inspection record and look at the Status dropdown on the Info tab. If it is not already marked Completed, change it from Open to Completed. A lot of the time it will already be completed, and you can go straight to the next section.
Confirm and save
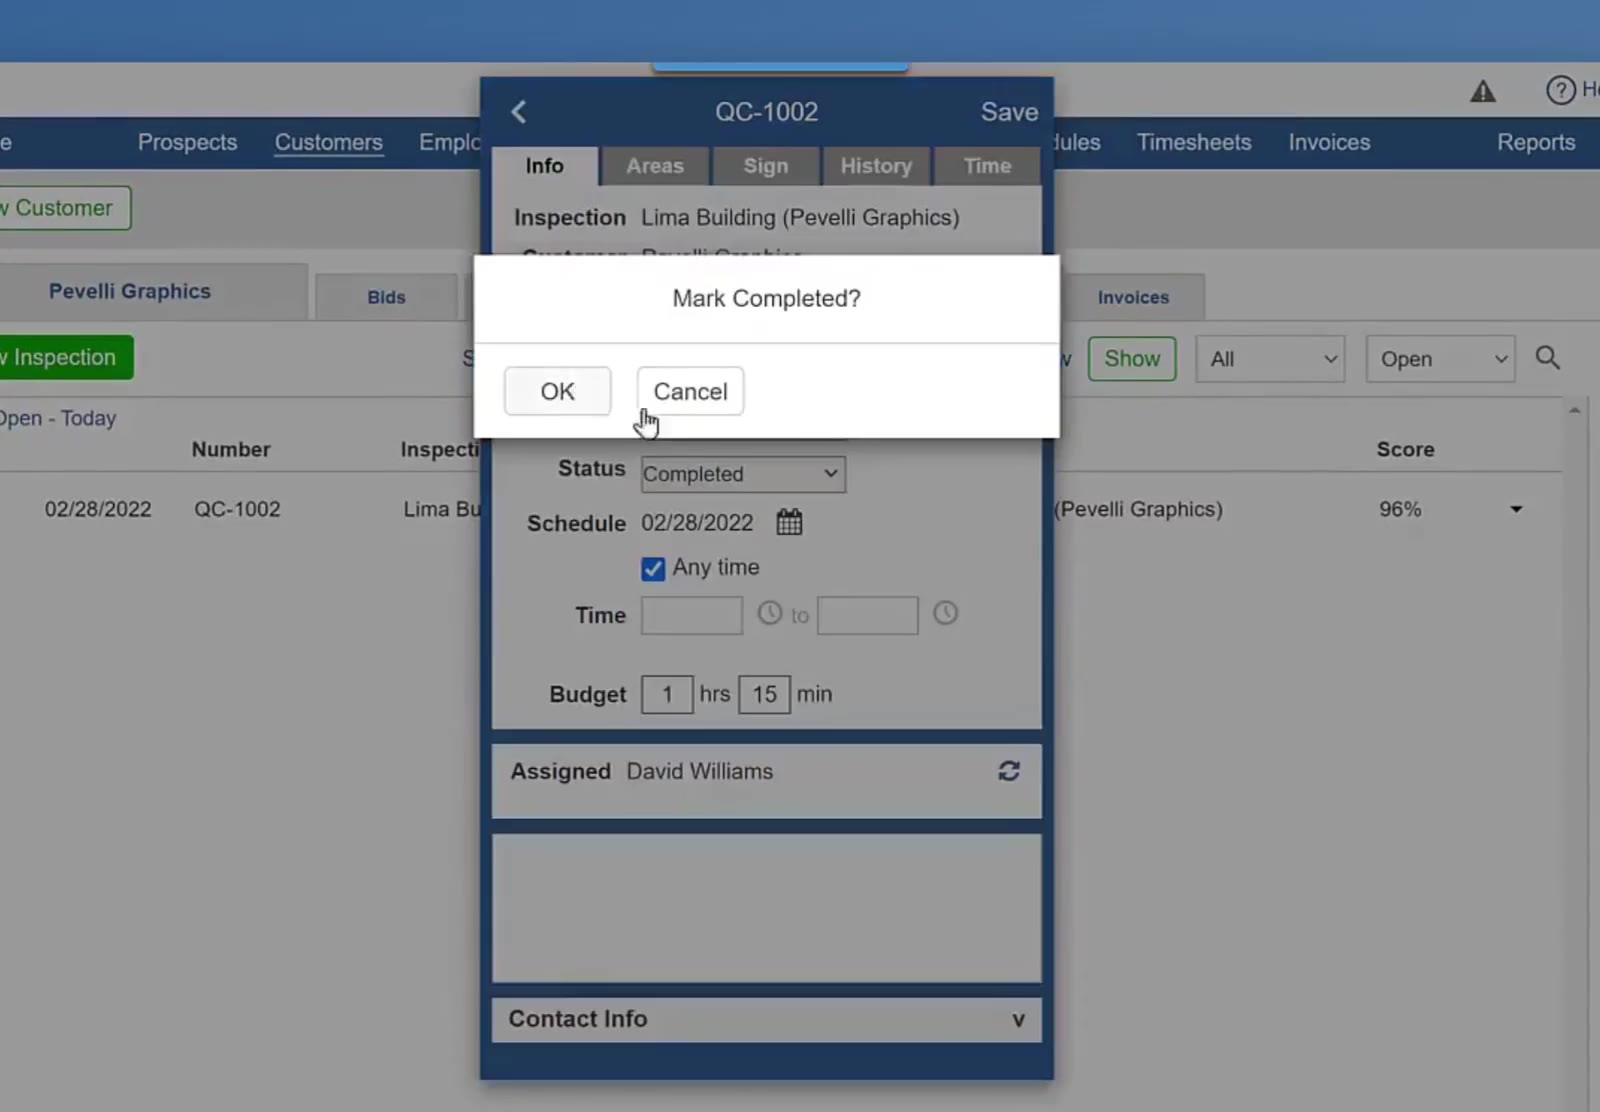
CleanGuru asks Mark Completed? — click OK. The Status line then shows the completion date. Click Save at the top of the record.
Open the Performance Review
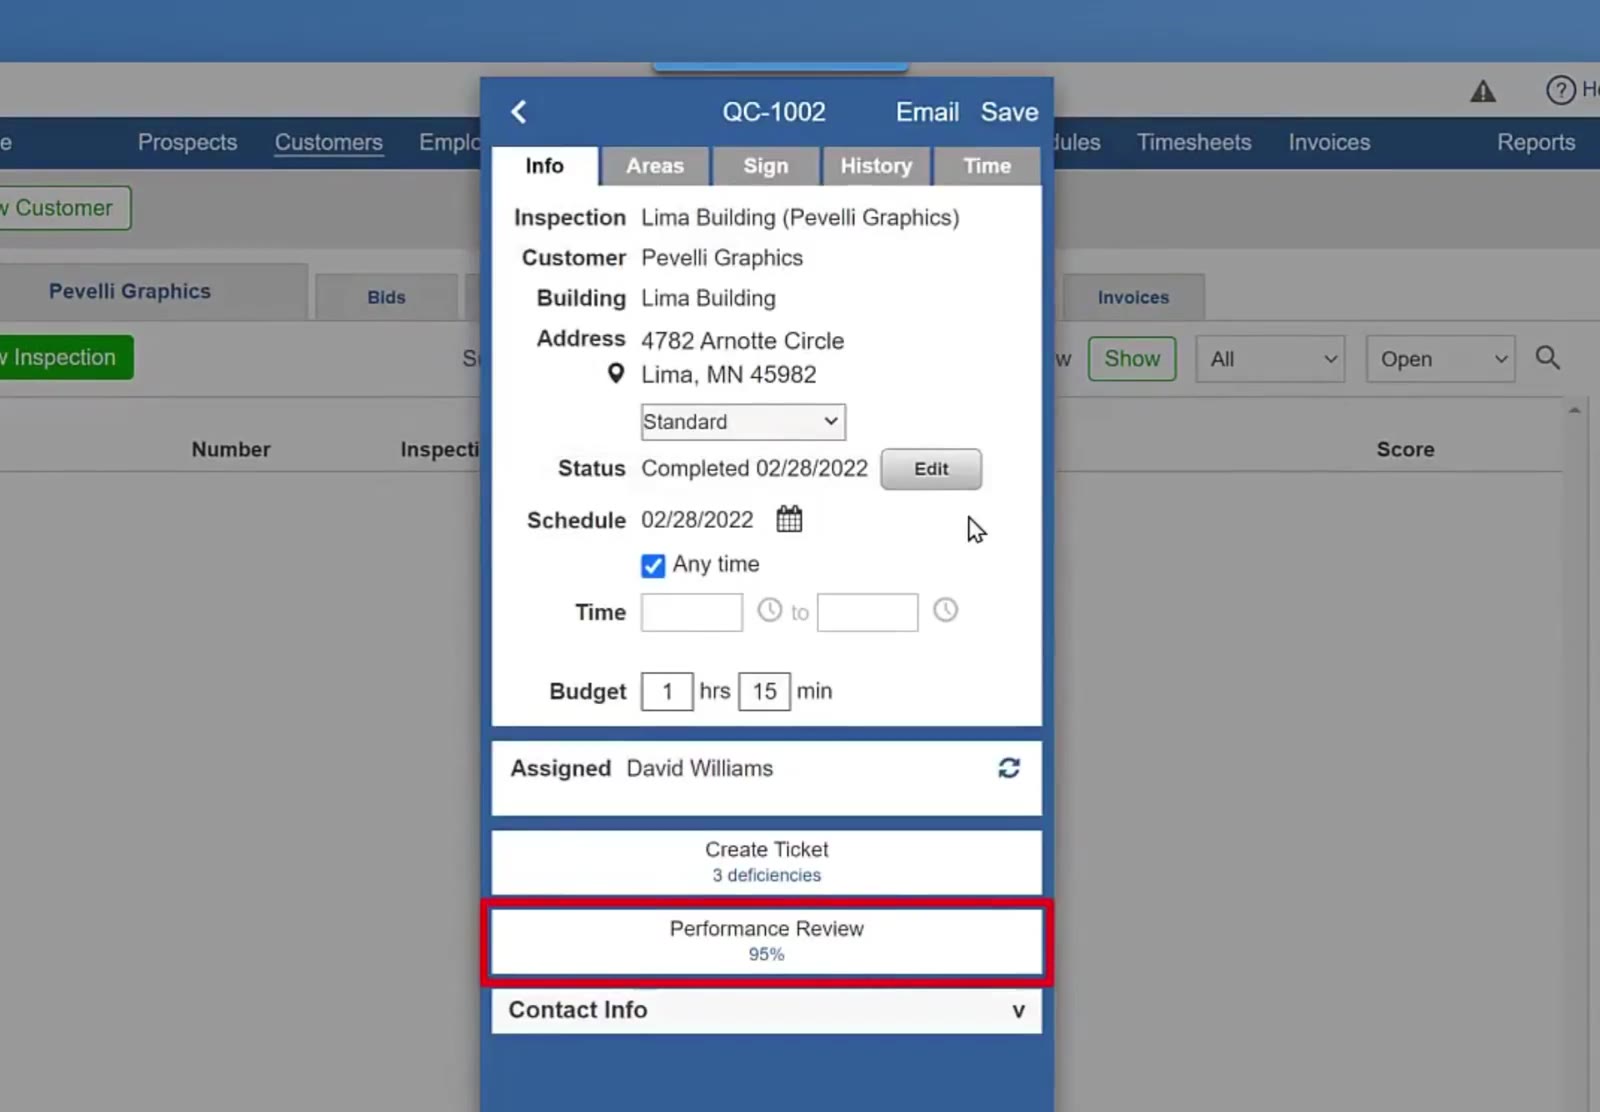
Two buttons appear at the bottom of the record: Create Ticket, with the number of deficiencies under it, and Performance Review, with the inspection score under it. Click Performance Review. CleanGuru opens the customer’s Performance Review tab with the building already selected, and lists the date, inspection number and score.
Build the Report
Choose what goes in the report
Tick the parts you want to include: Performance to Goal by Area, Best and Targeted Areas, Best and Targeted Items and Score History. The box beside Score History sets how many past inspections the chart covers.
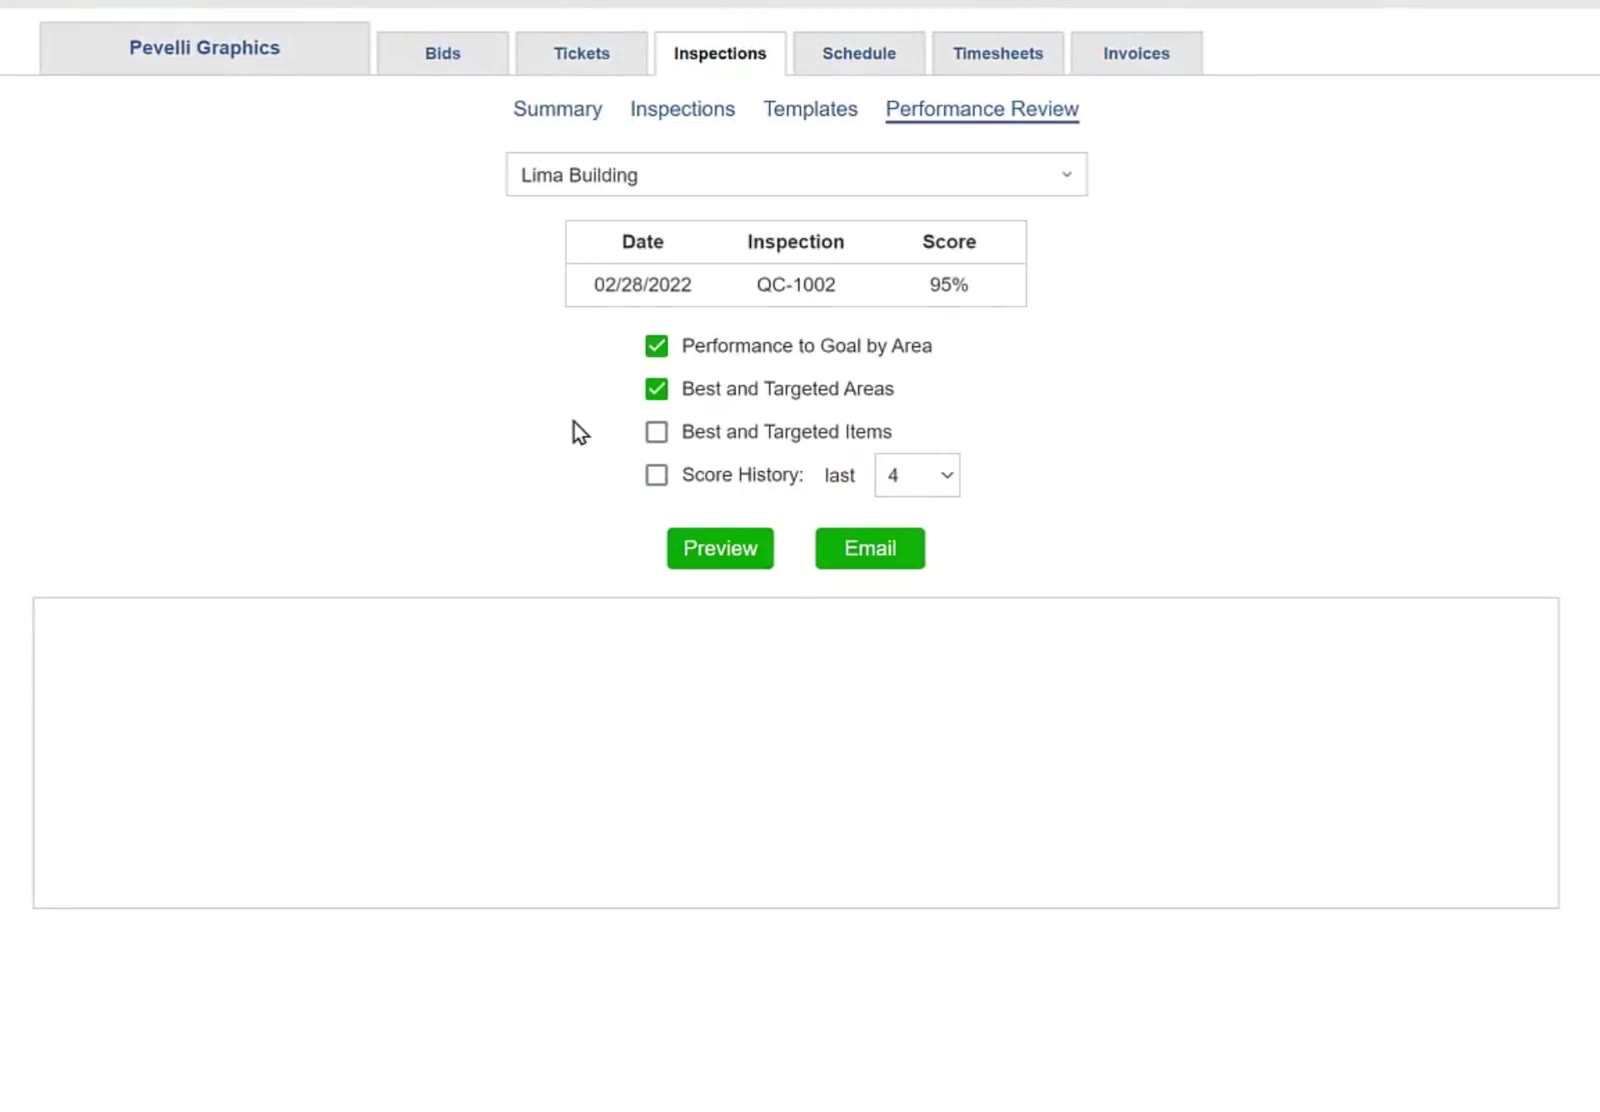
You can show anywhere from 2 to 12 past inspections in the score history.
Click Preview and set the include options
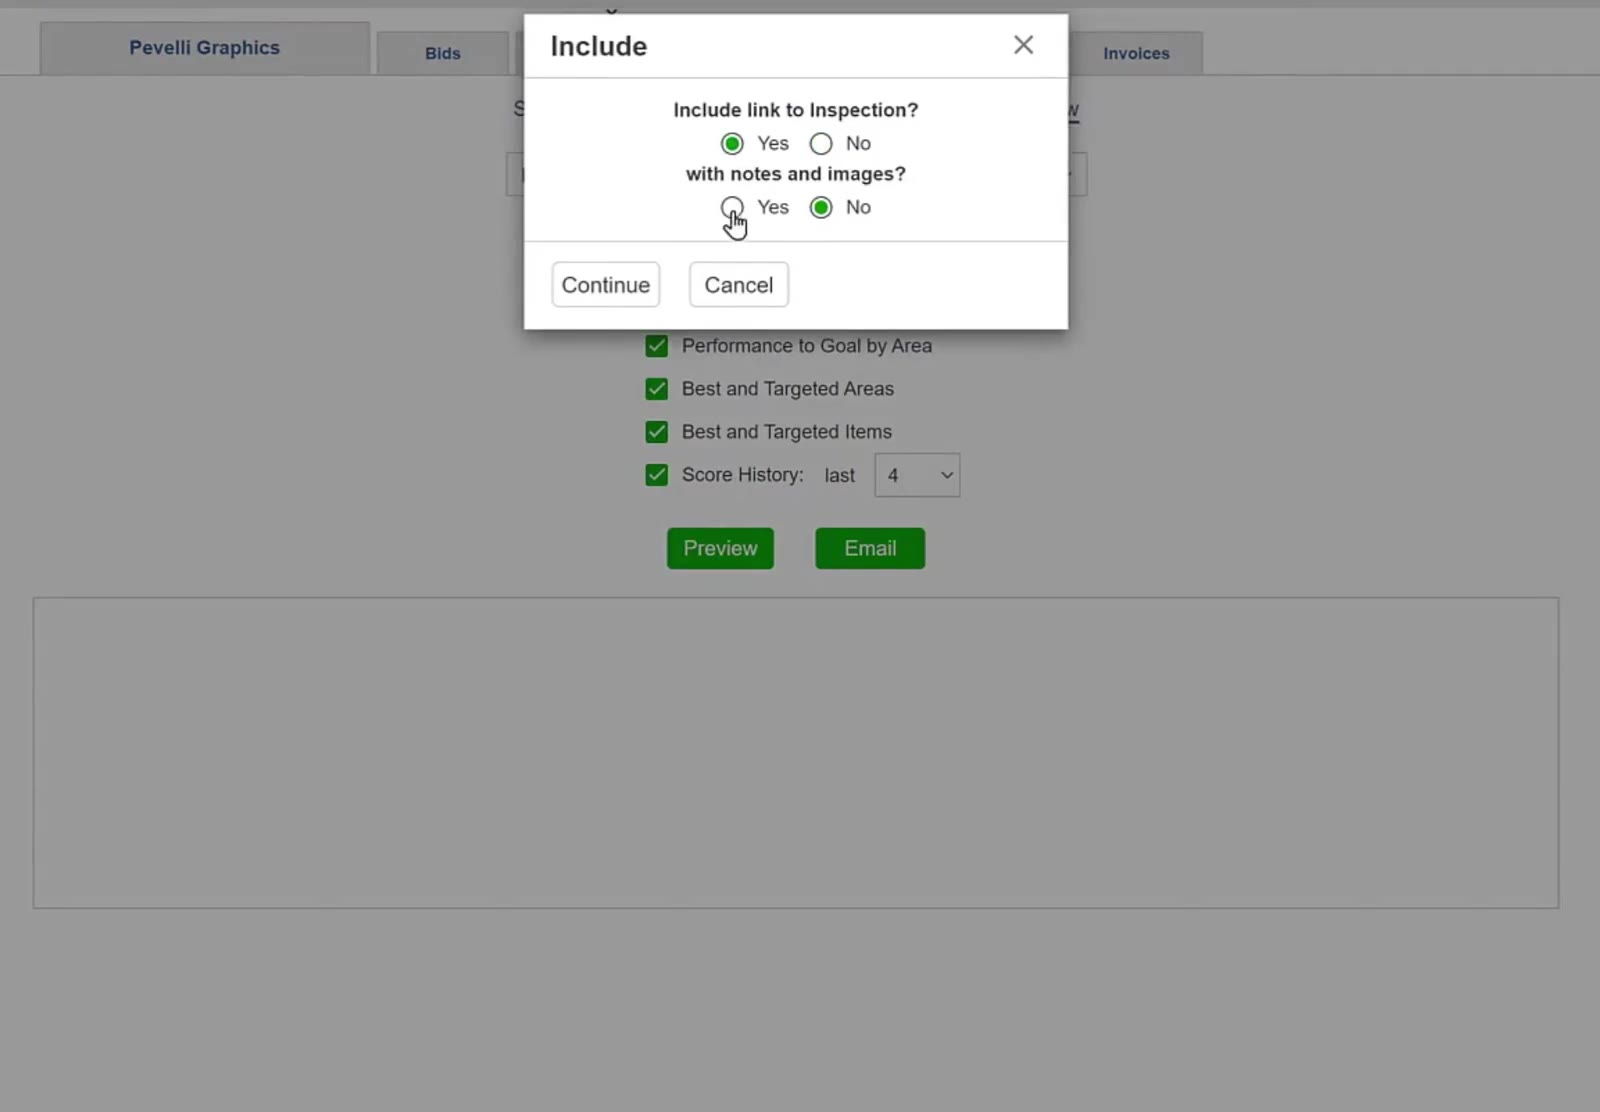
Click the green Preview button. An Include window asks Include link to Inspection? If you answer Yes, a second question appears asking whether to include notes and images. Answer both, then click Continue.
Read the report
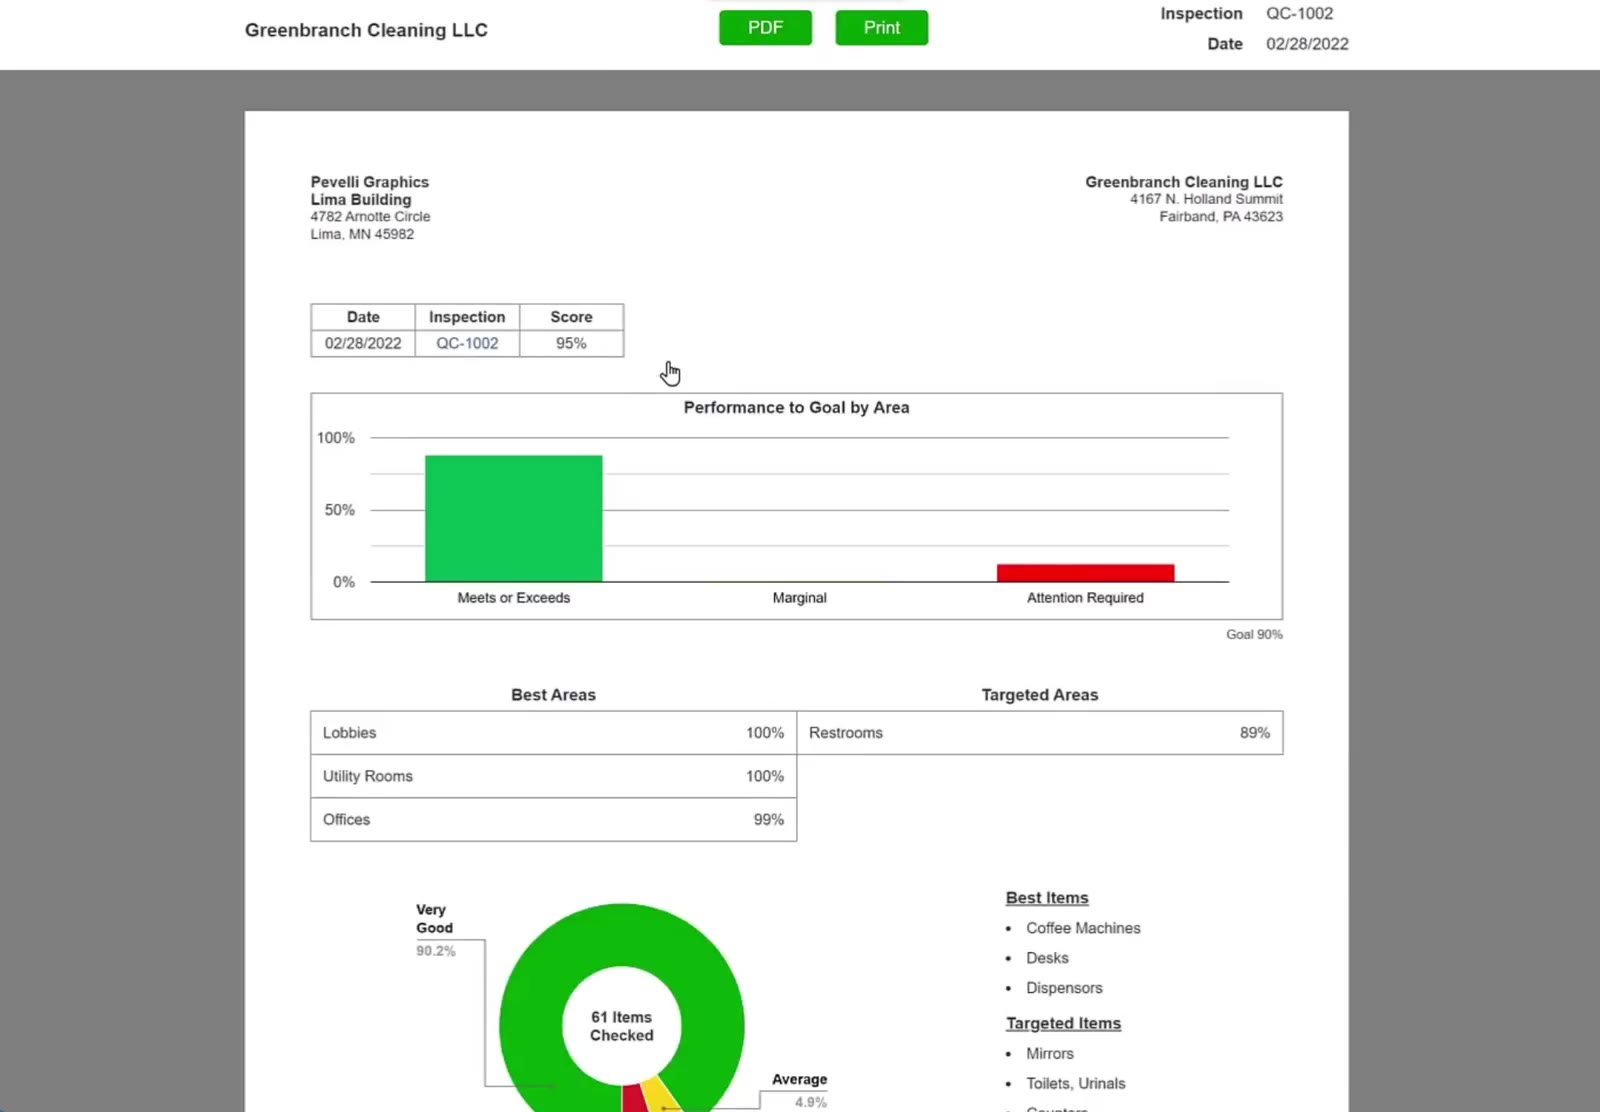
The report opens on screen. It shows the Performance to Goal by Area chart against your goal line, the Best Areas and Targeted Areas lists, and a breakdown of the Best Items and Targetitems that were checked. This is a web page, not a PDF. Use the green PDF button at the top to make a PDF of it, or Print to print it.
Open the inspection detail
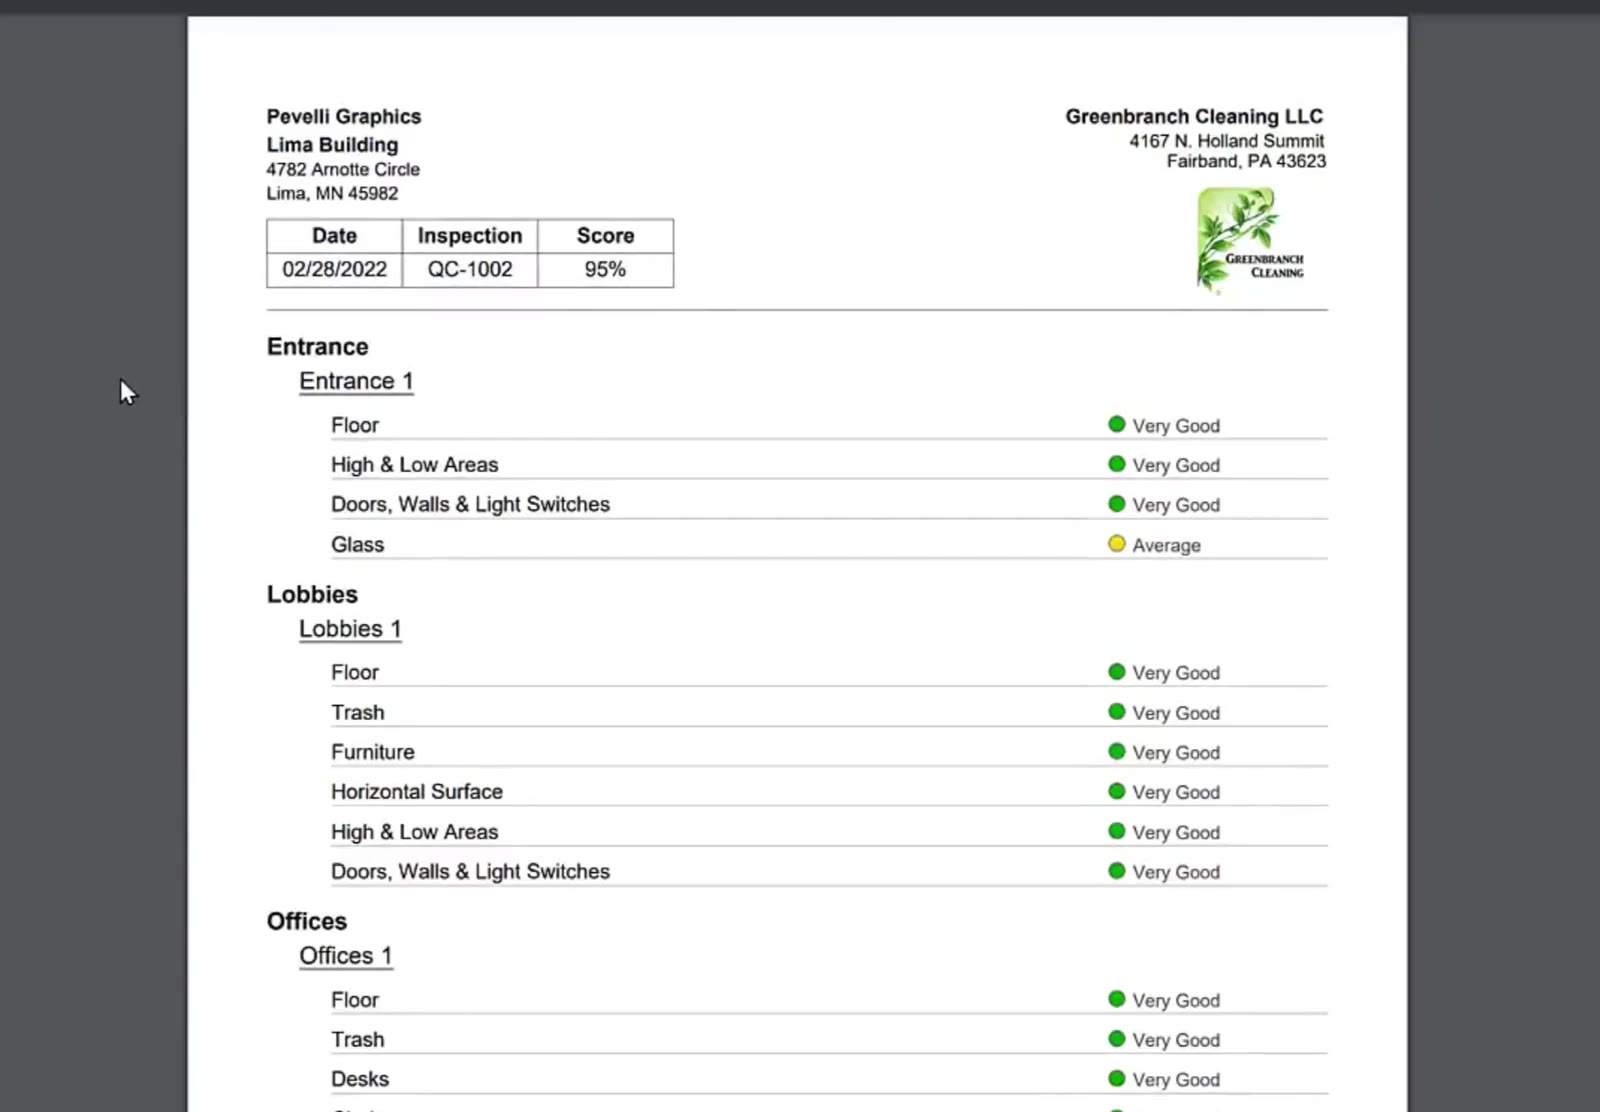
If you chose to include the link to the inspection, the inspection number on the report is clickable. Click it and CleanGuru makes a PDF of the inspection itself, listing every area and item that was checked with its rating.
Send It to the Customer
Click Email and pick who gets it
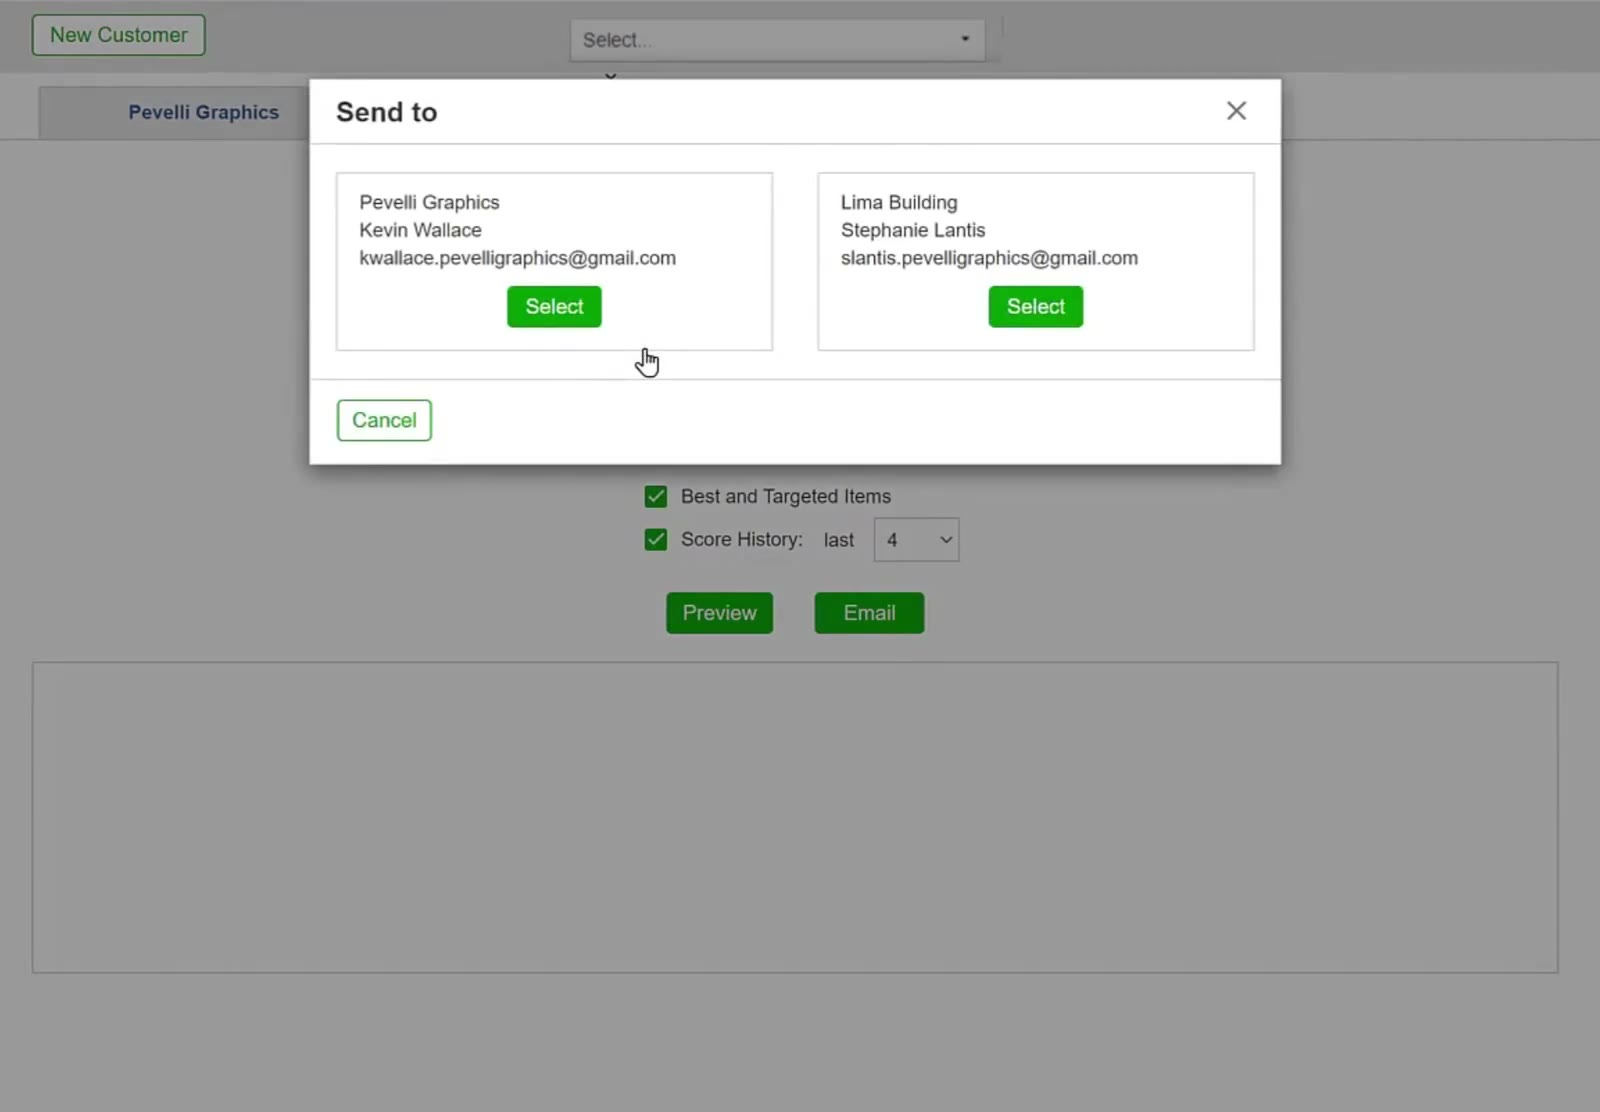
Back on the Performance Review tab, click the green Email button. The Include window comes up again, so set your choices and click Continue. The Send to window then shows two choices side by side. One is the customer, and the other is the building the inspection was done at. Click the green Select button on the one you want.
Check the email and send it
The Send Email window shows who the email is from, the To address, the subject and the message. To send it to more than one person, type the extra addresses into the To box. Click Send when it looks right.
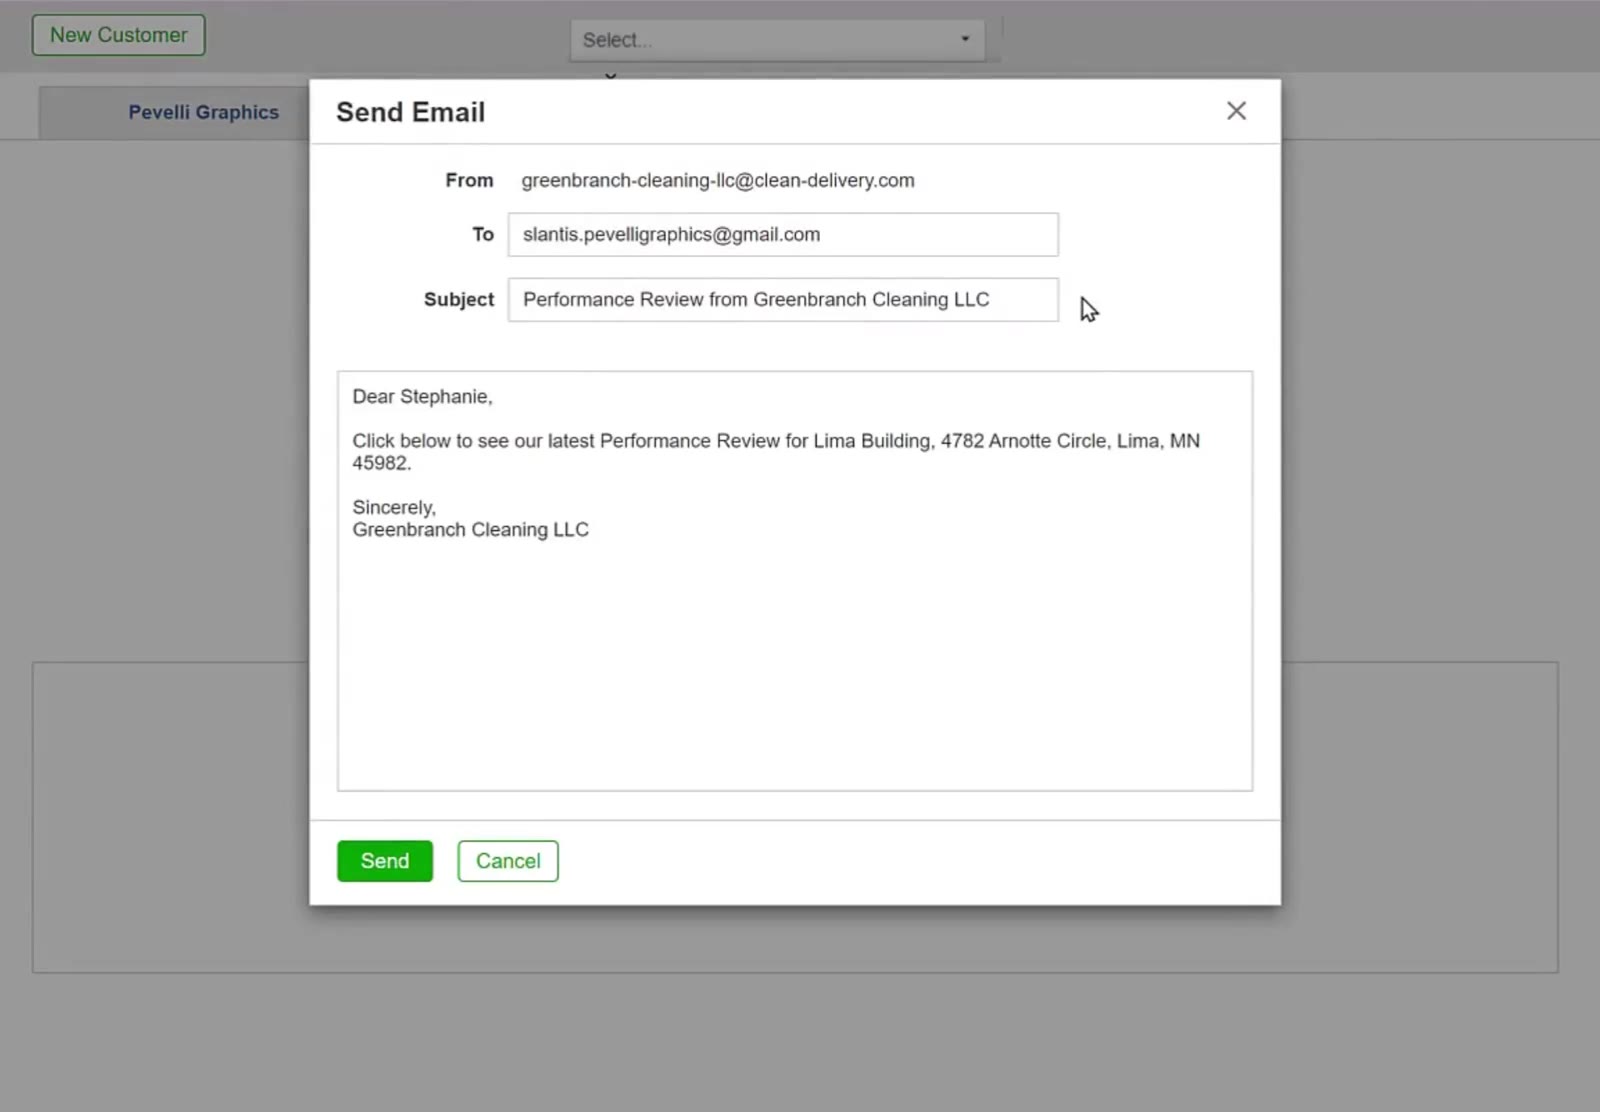
The standard message that fills in here can be changed in Settings, so you do not have to rewrite it every time.