
Scheduling Help article
Employee – Mobile app for Scheduling and Timekeeping
The CleanGuru mobile app is where cleaners see the work assigned to them and record their hours. Log in and you can view the day’s tickets, open one to see the address and the budgeted time, check in and out against it, and reach your supervisor from the same screen. This guide covers logging in, working through your schedule, and tracking your time.
Accessing Your Schedule
You need your CleanGuru credentials to sign in. Once you are in, the app is your hub for the work assigned to you.
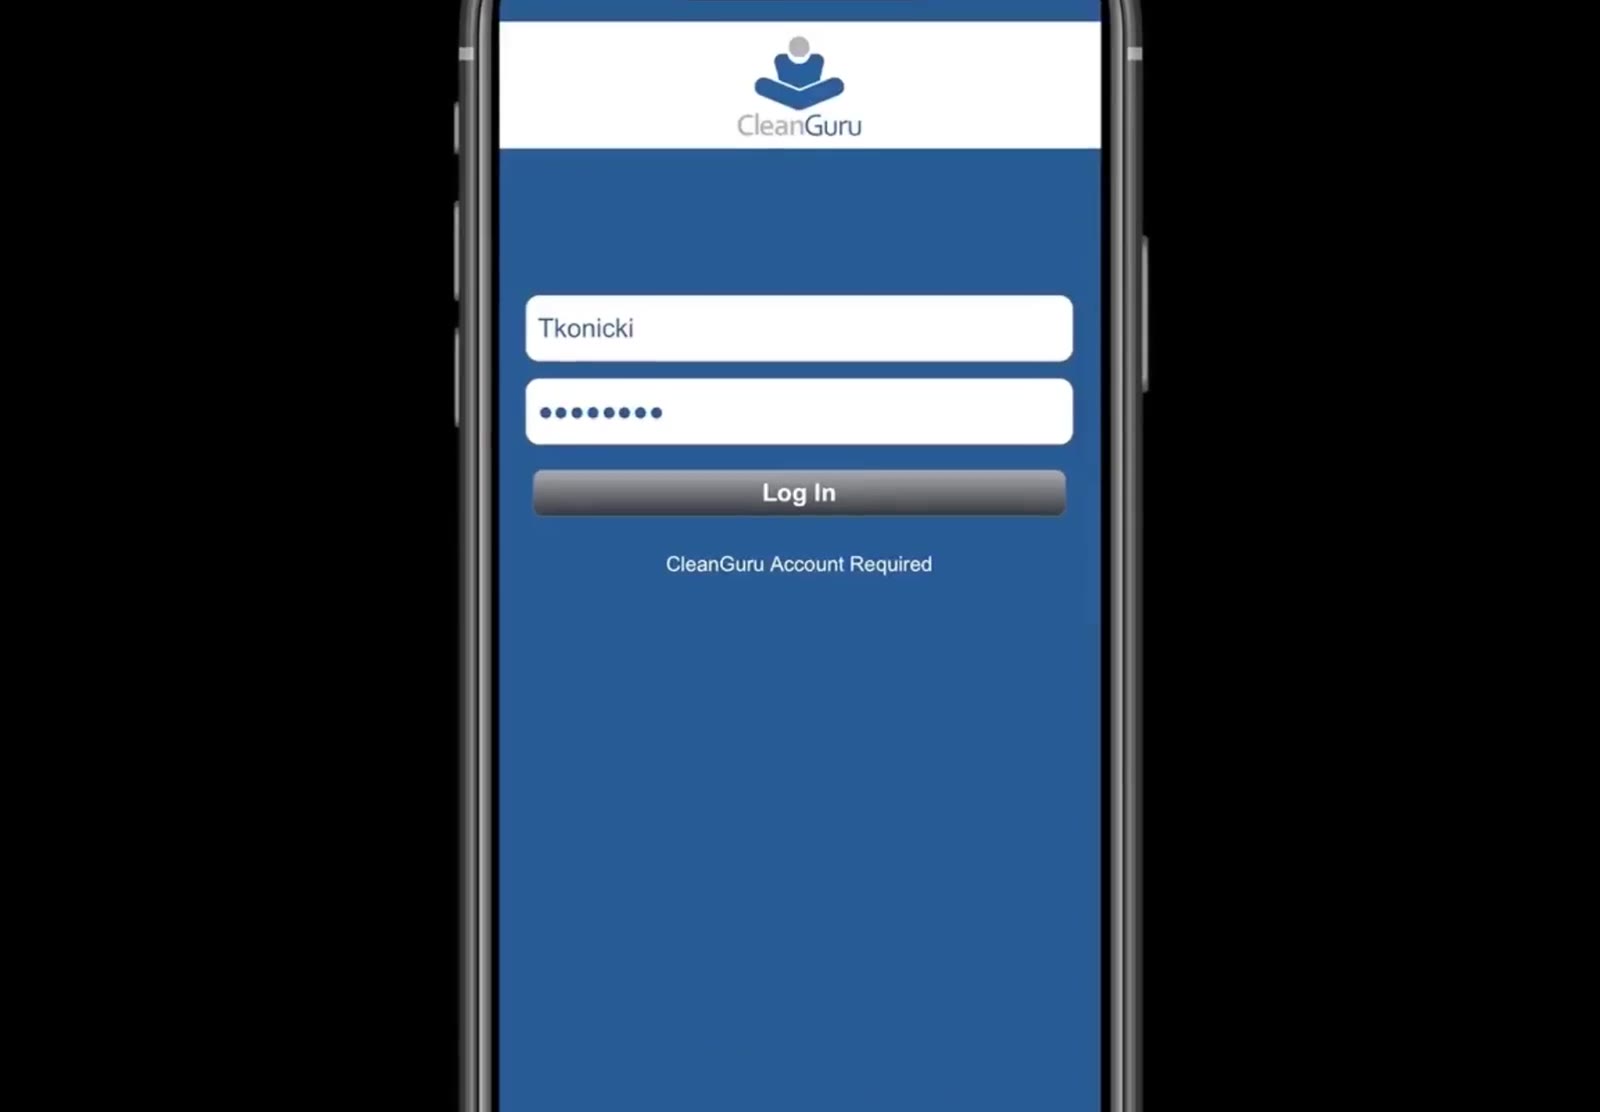
Log in
Enter your username and password and tap Log In. A Forgot password? link sits at the bottom of the screen if you need it. The app then syncs your latest schedule.
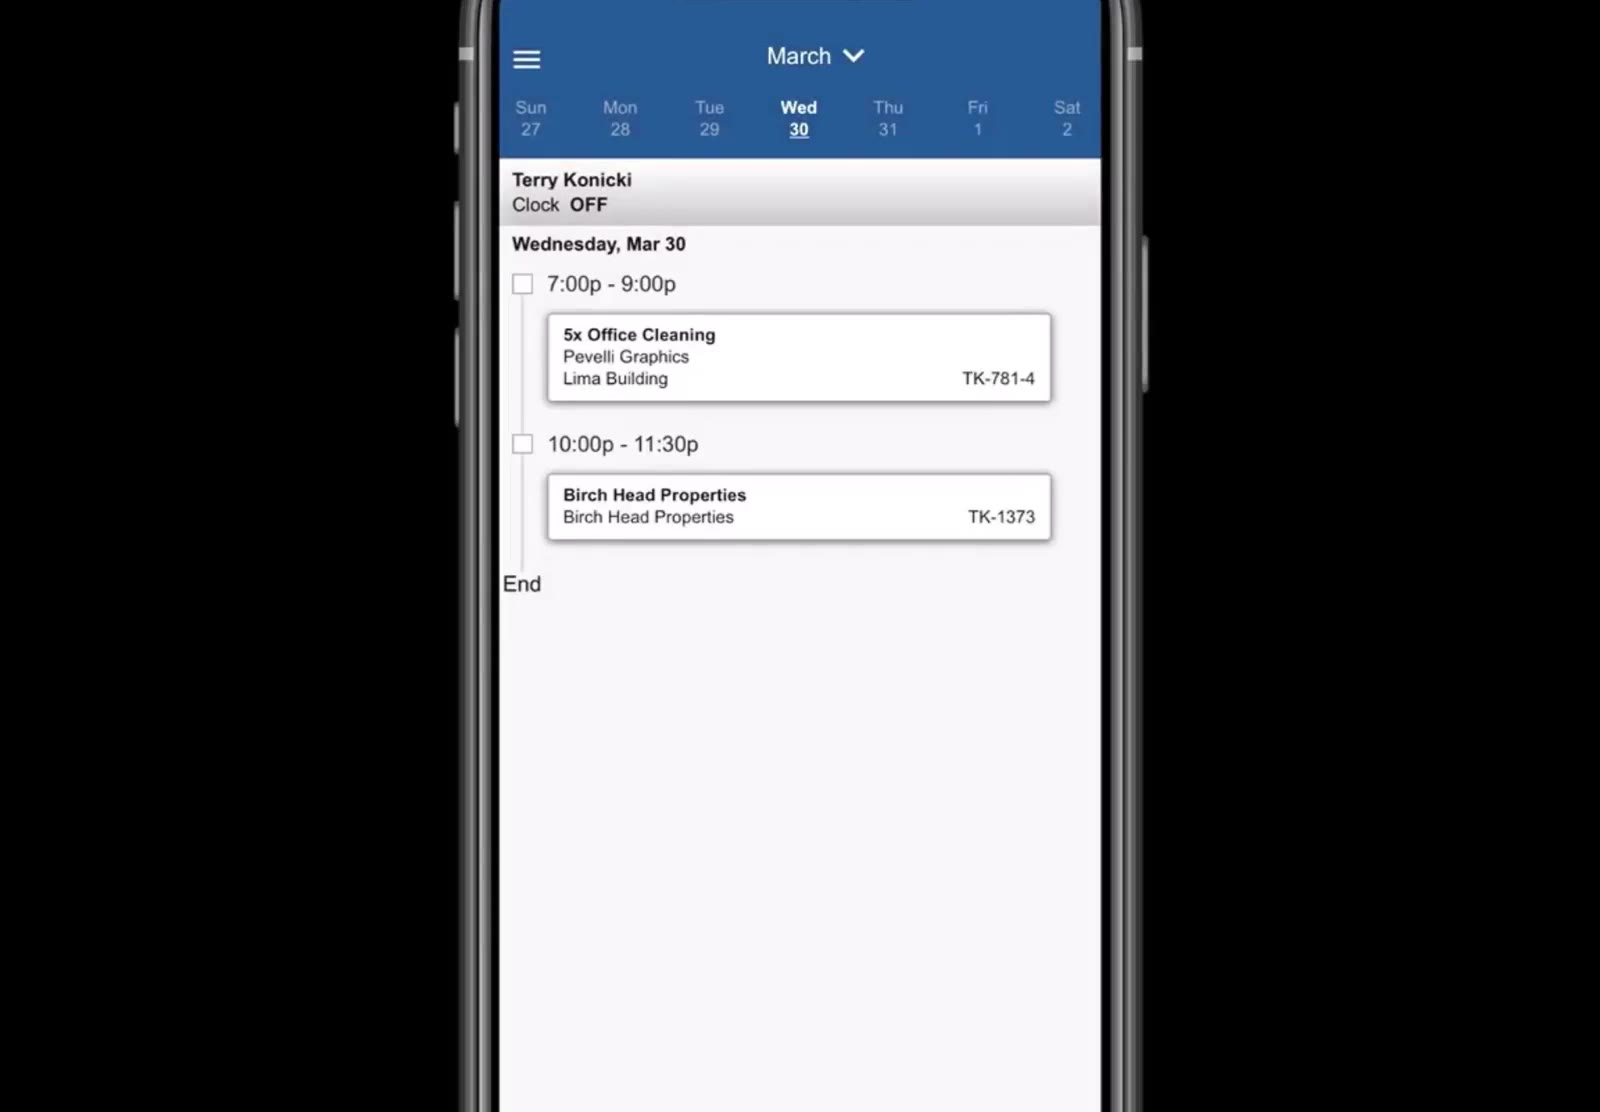
Check your schedule
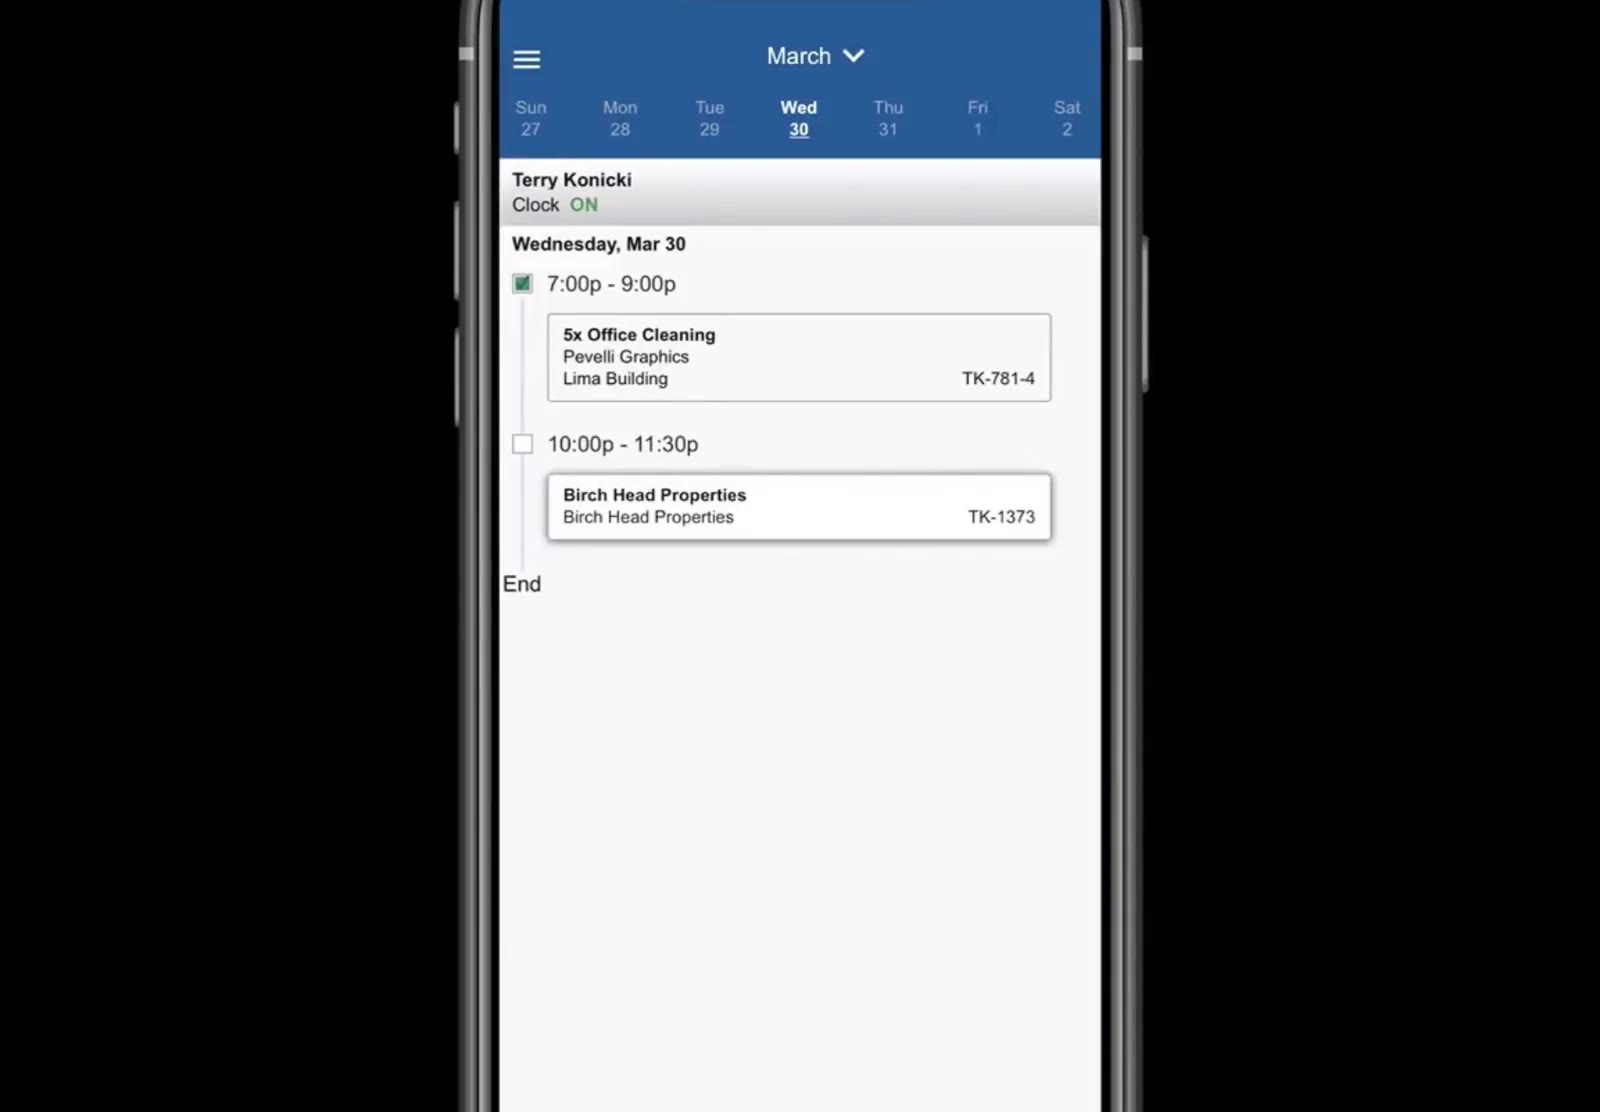
The app opens on the day’s work. Your name and clock status sit at the top, followed by each time block and the tickets in it — the task, the customer, the building and the ticket number. Use the day strip or the month dropdown above it to look at another date.
Open a ticket
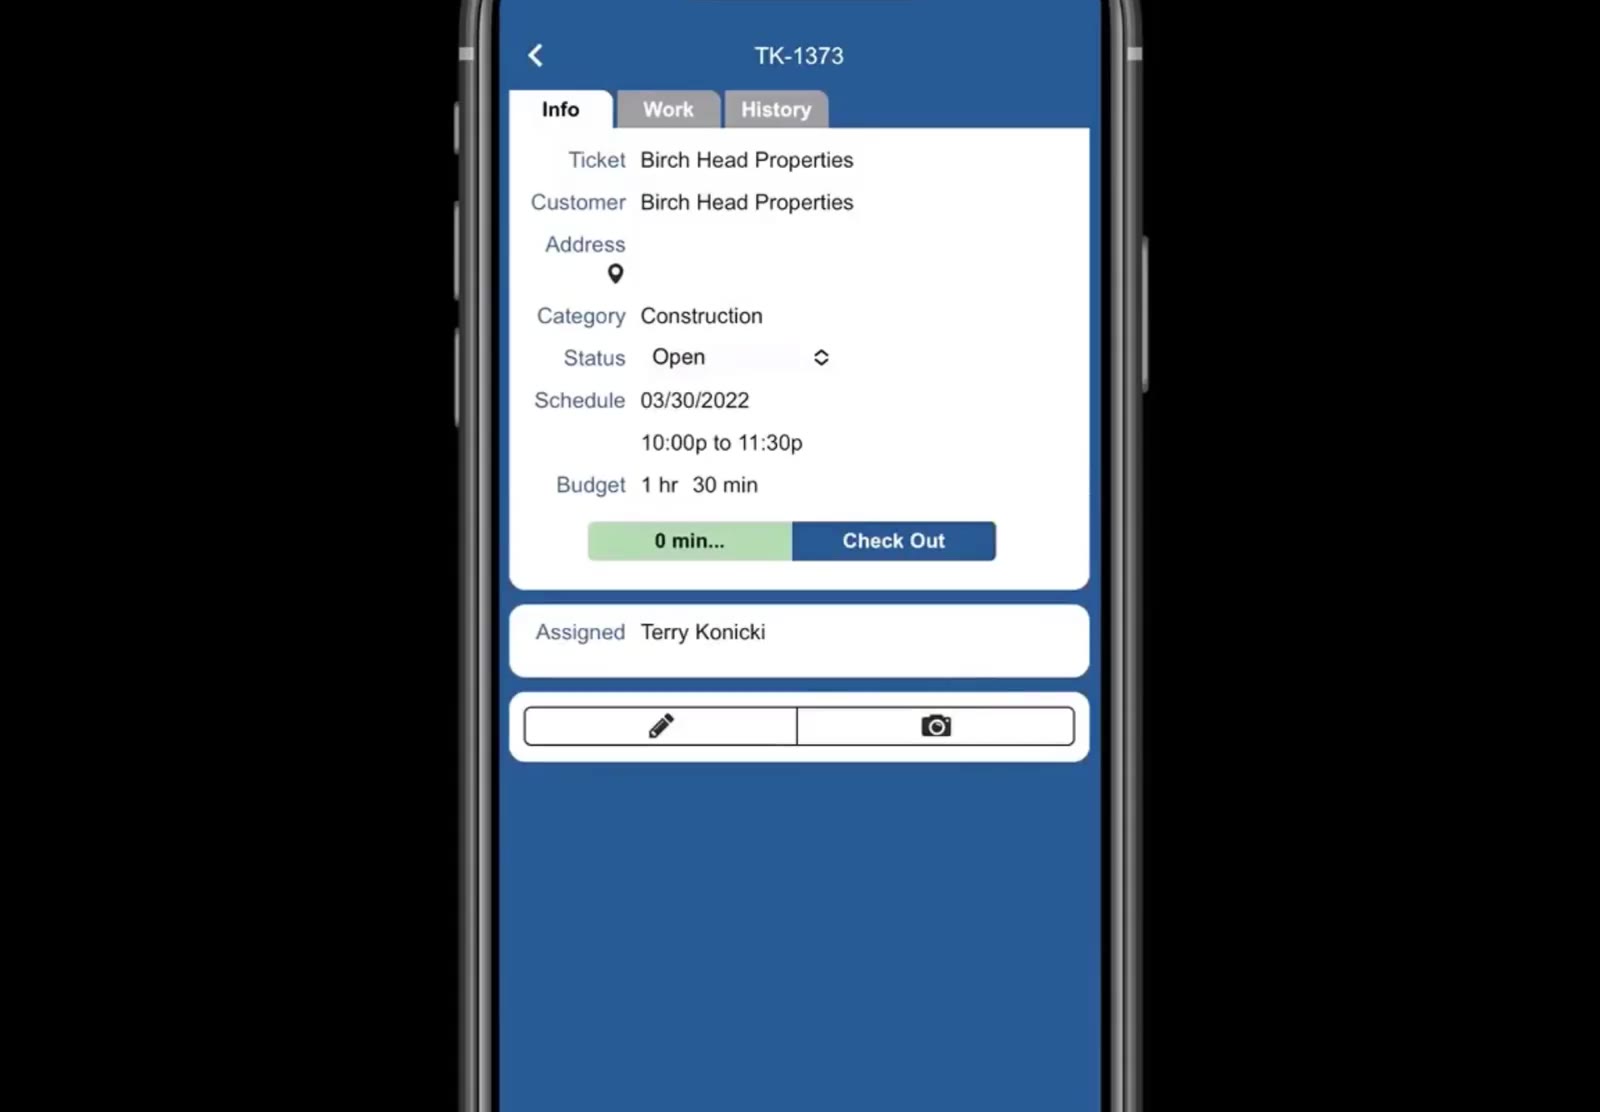
Tap an assignment to open its Info tab, which shows the customer, building, address, category, status, scheduled time, budgeted hours and who is assigned. Any note from the office appears below the buttons.
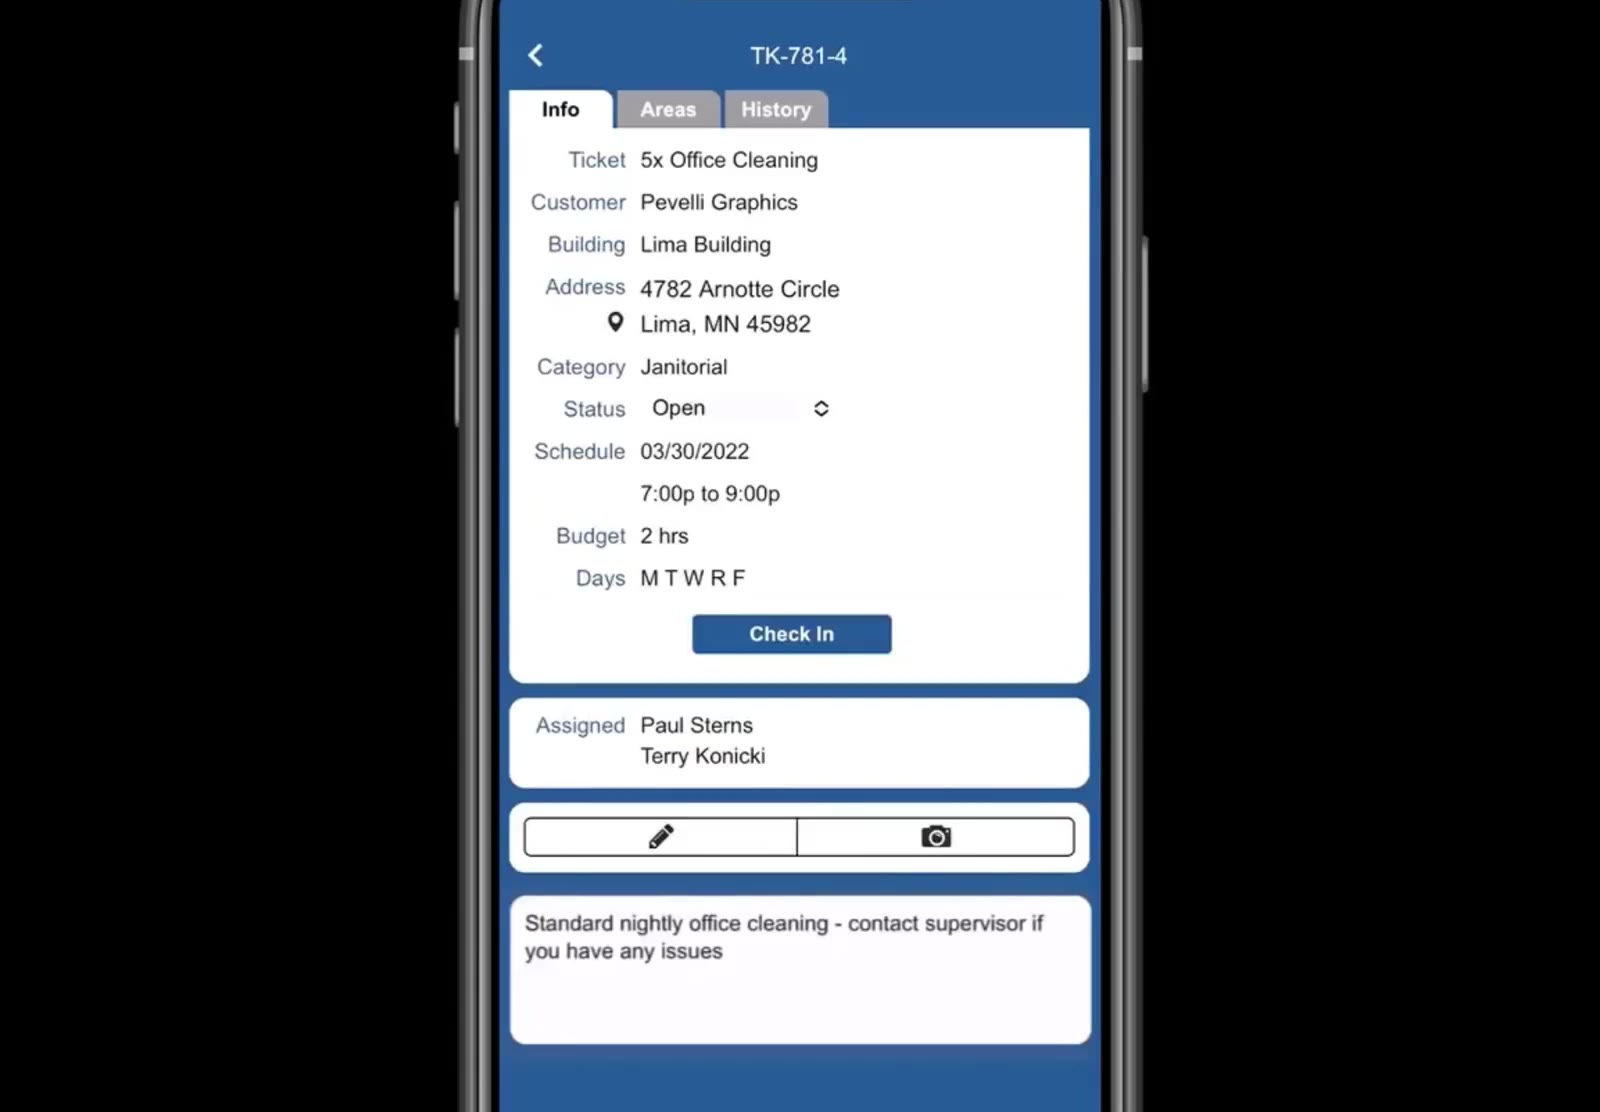
Read the note on the ticket before you start — it is where the office puts instructions for the job, such as “Standard nightly office cleaning – contact supervisor if you have any issues.”
Tracking Your Work Time
Time is recorded against one ticket at a time, using Check In when you arrive and Check Out when you finish.
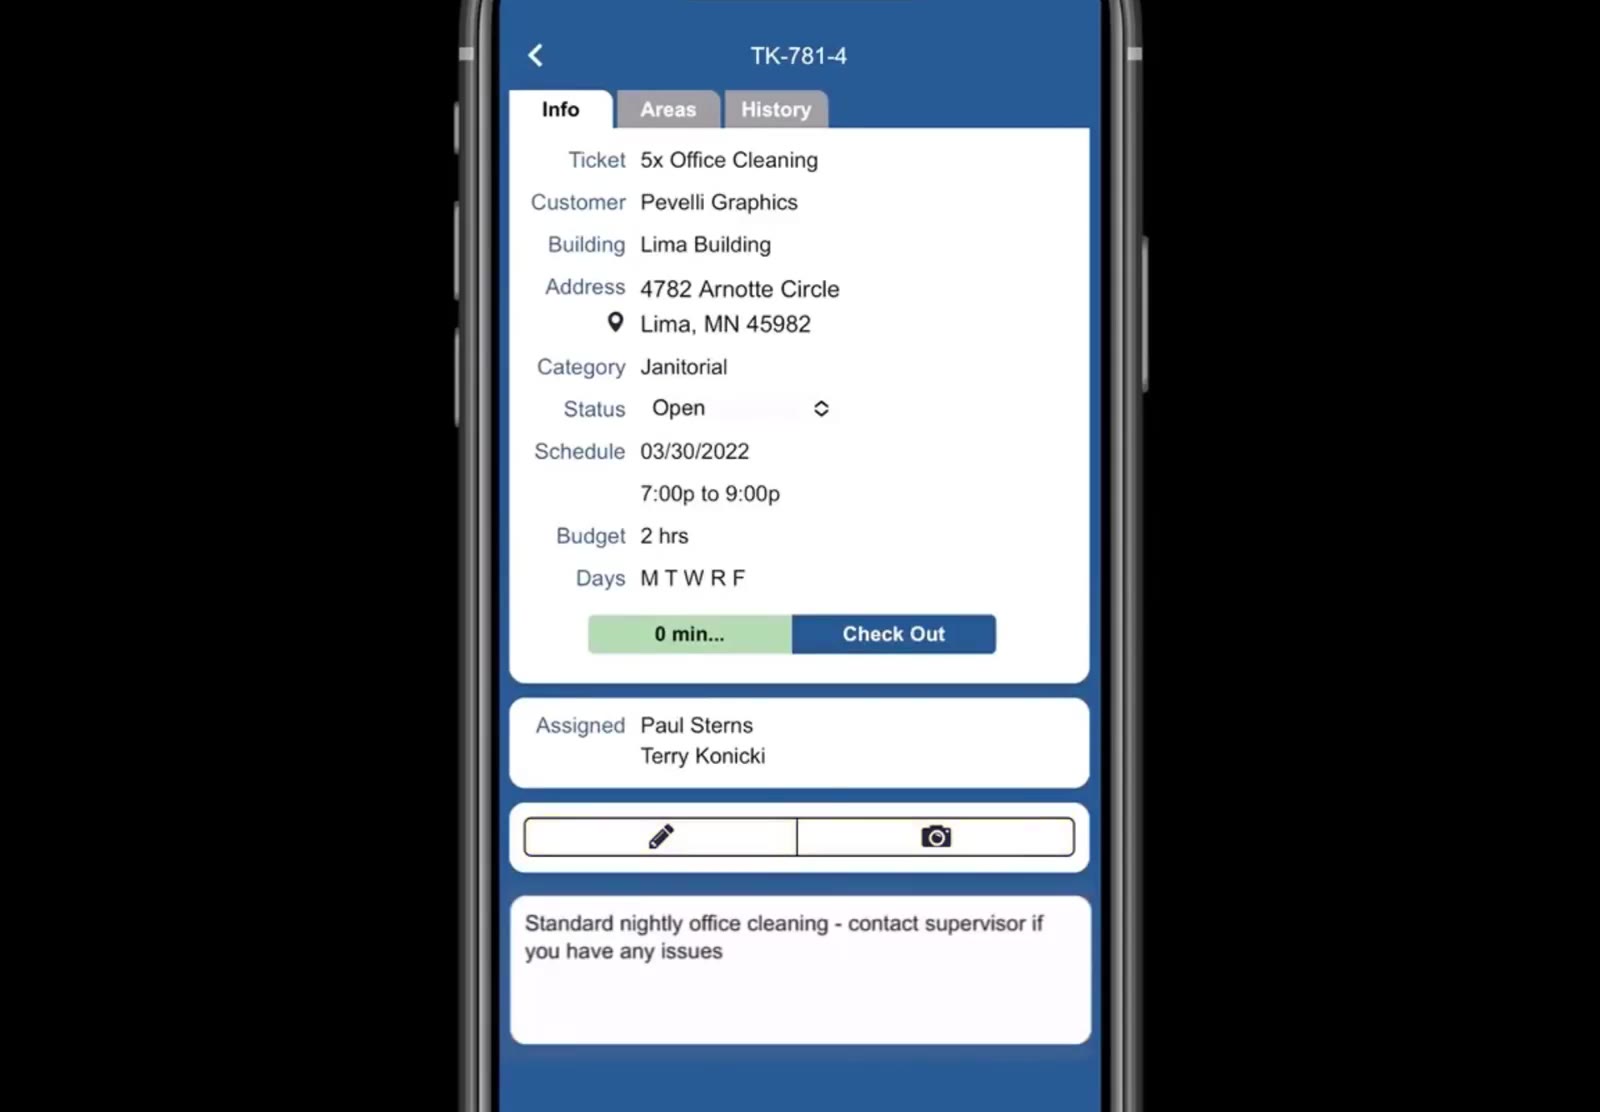
Check in when you arrive
Open the ticket and tap Check In. A running timer appears beside the button, and the button becomes Check Out.
Check out when you finish
Tap Check Out. The app asks whether to mark the ticket completed. Tap Yes if the work is done, or No if you are stopping without finishing.
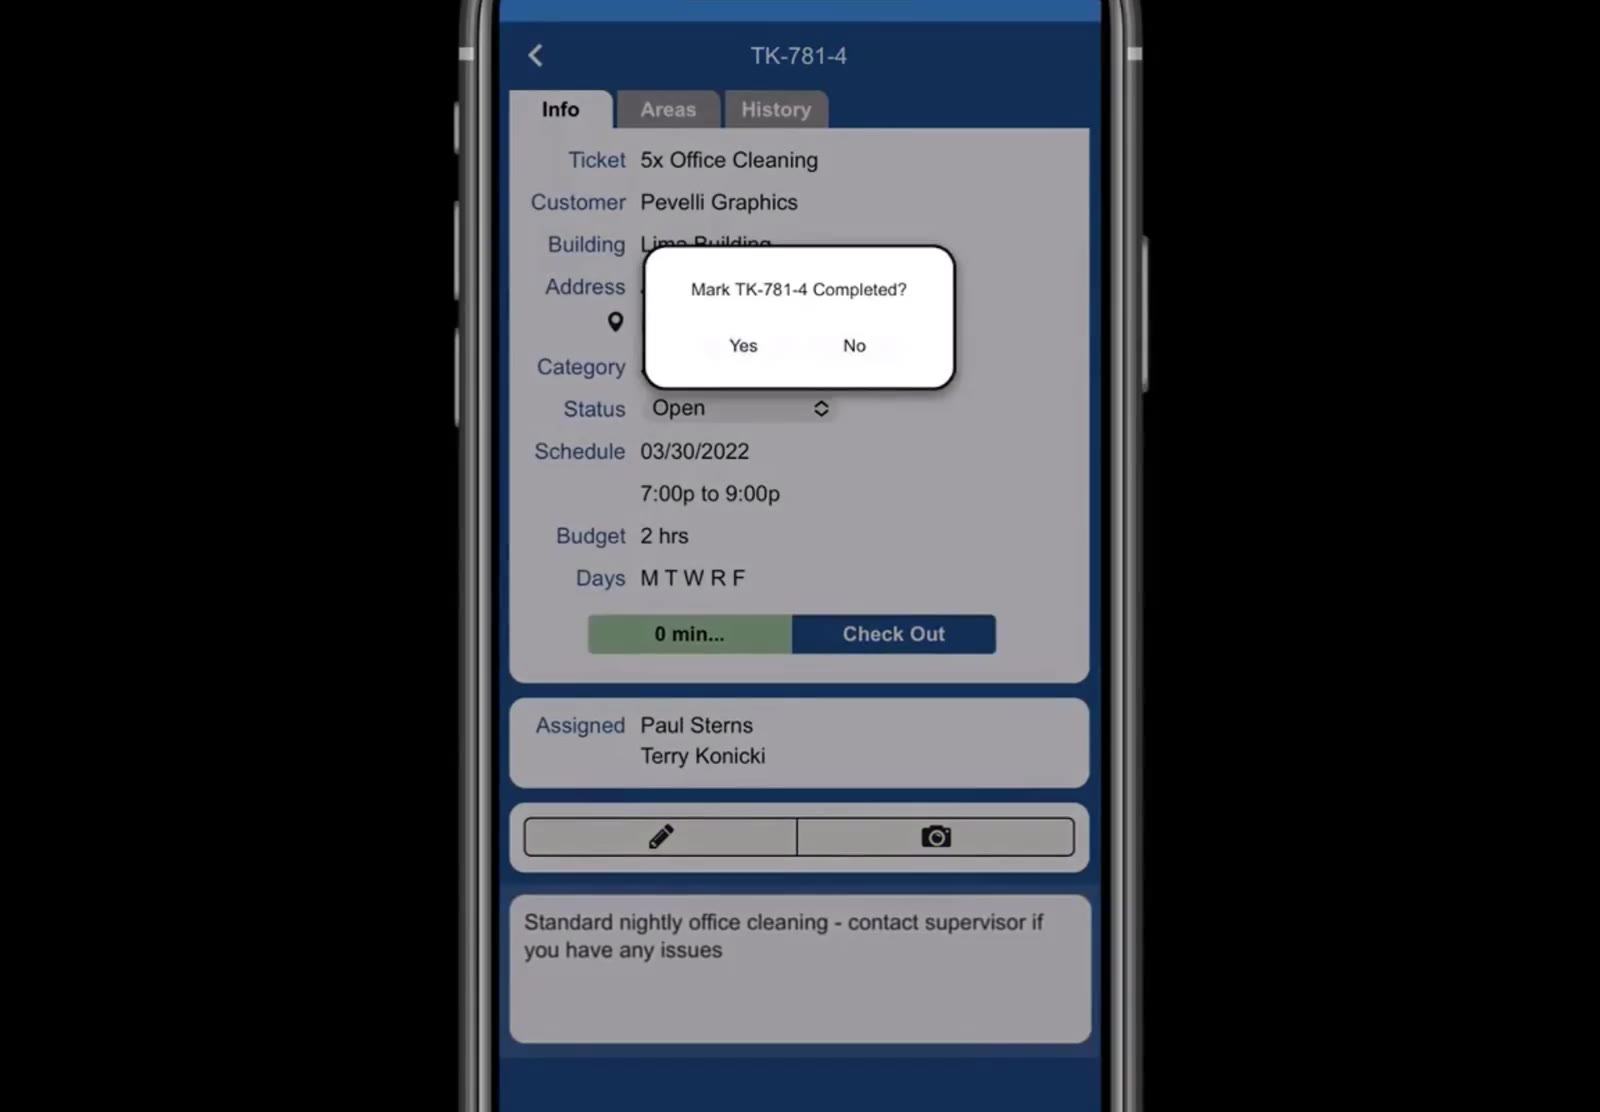
Say what happens next
After you answer, the ticket’s status changes to Completed and the app offers Check In: GENERAL, Check In: TRAVEL, Turn Clock OFF and Cancel. Use TRAVEL for time getting to the next job, GENERAL for working time that is not against a ticket, and Turn Clock OFF when your shift is over.
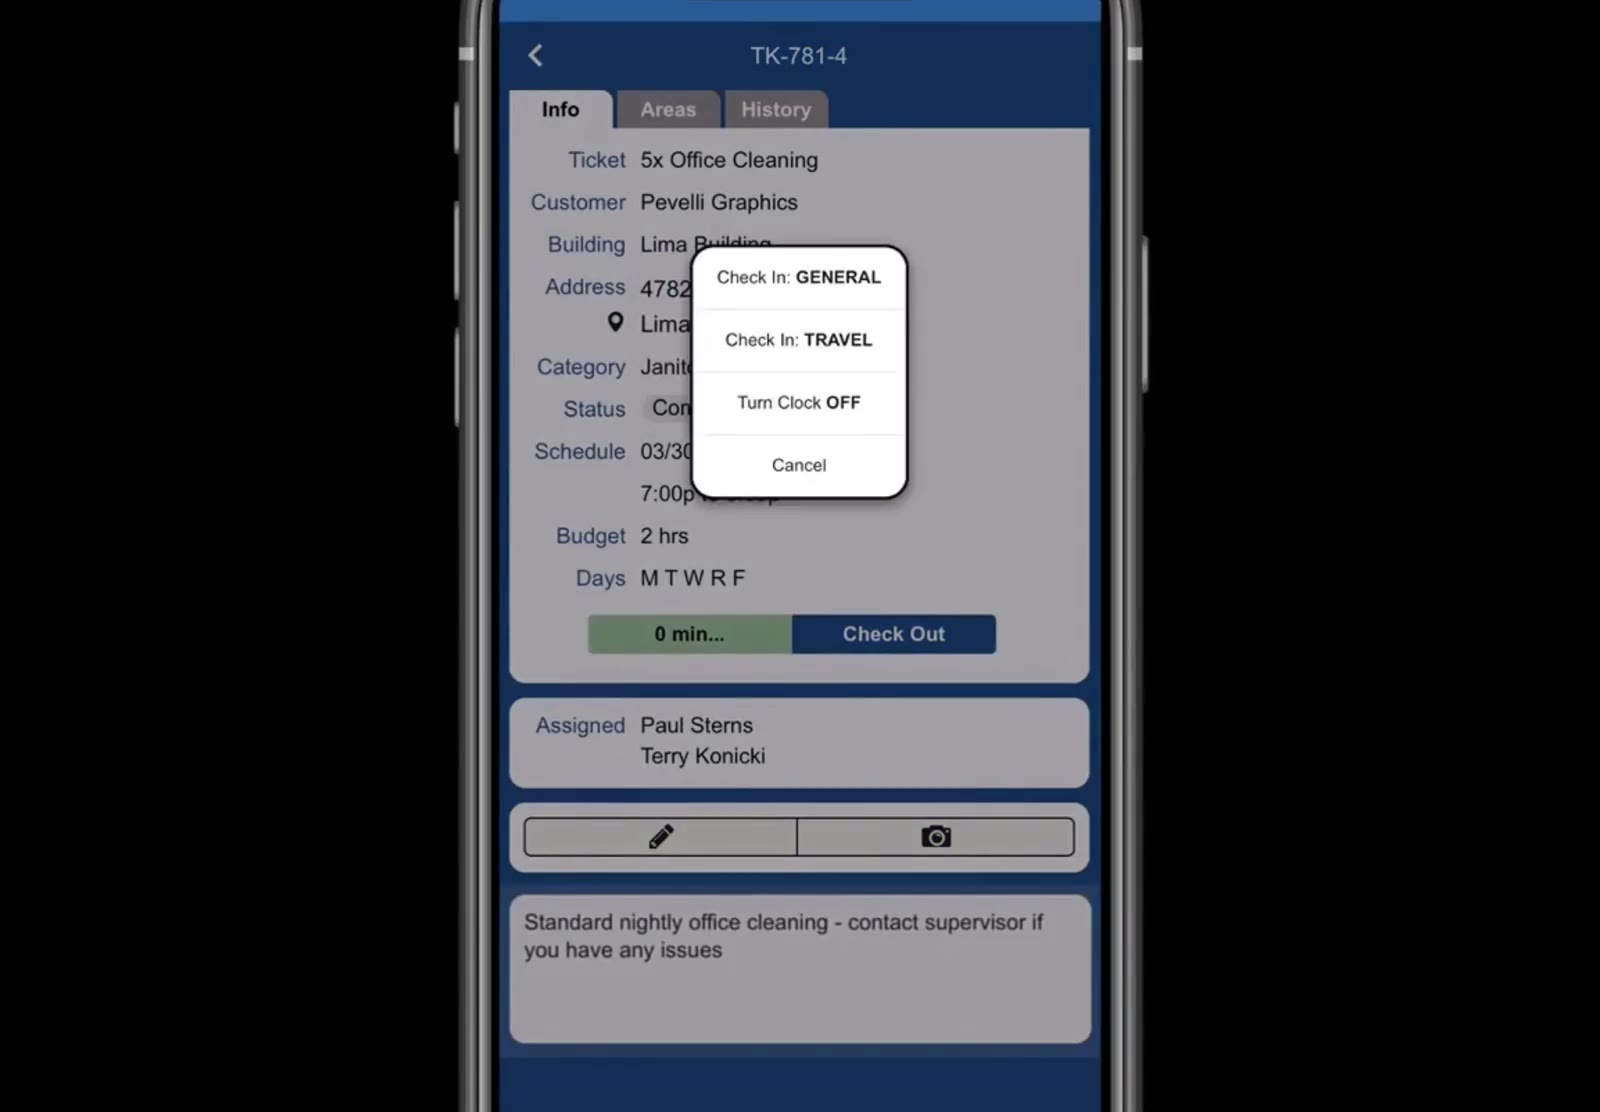
Adding Notes and Contacting Your Supervisor
The ticket screen carries two buttons above the note from the office, and a Supervisor button at the very bottom.
Add a note or a photo
Tap the pencil button to add a note about the job, or the camera button to attach a photo.
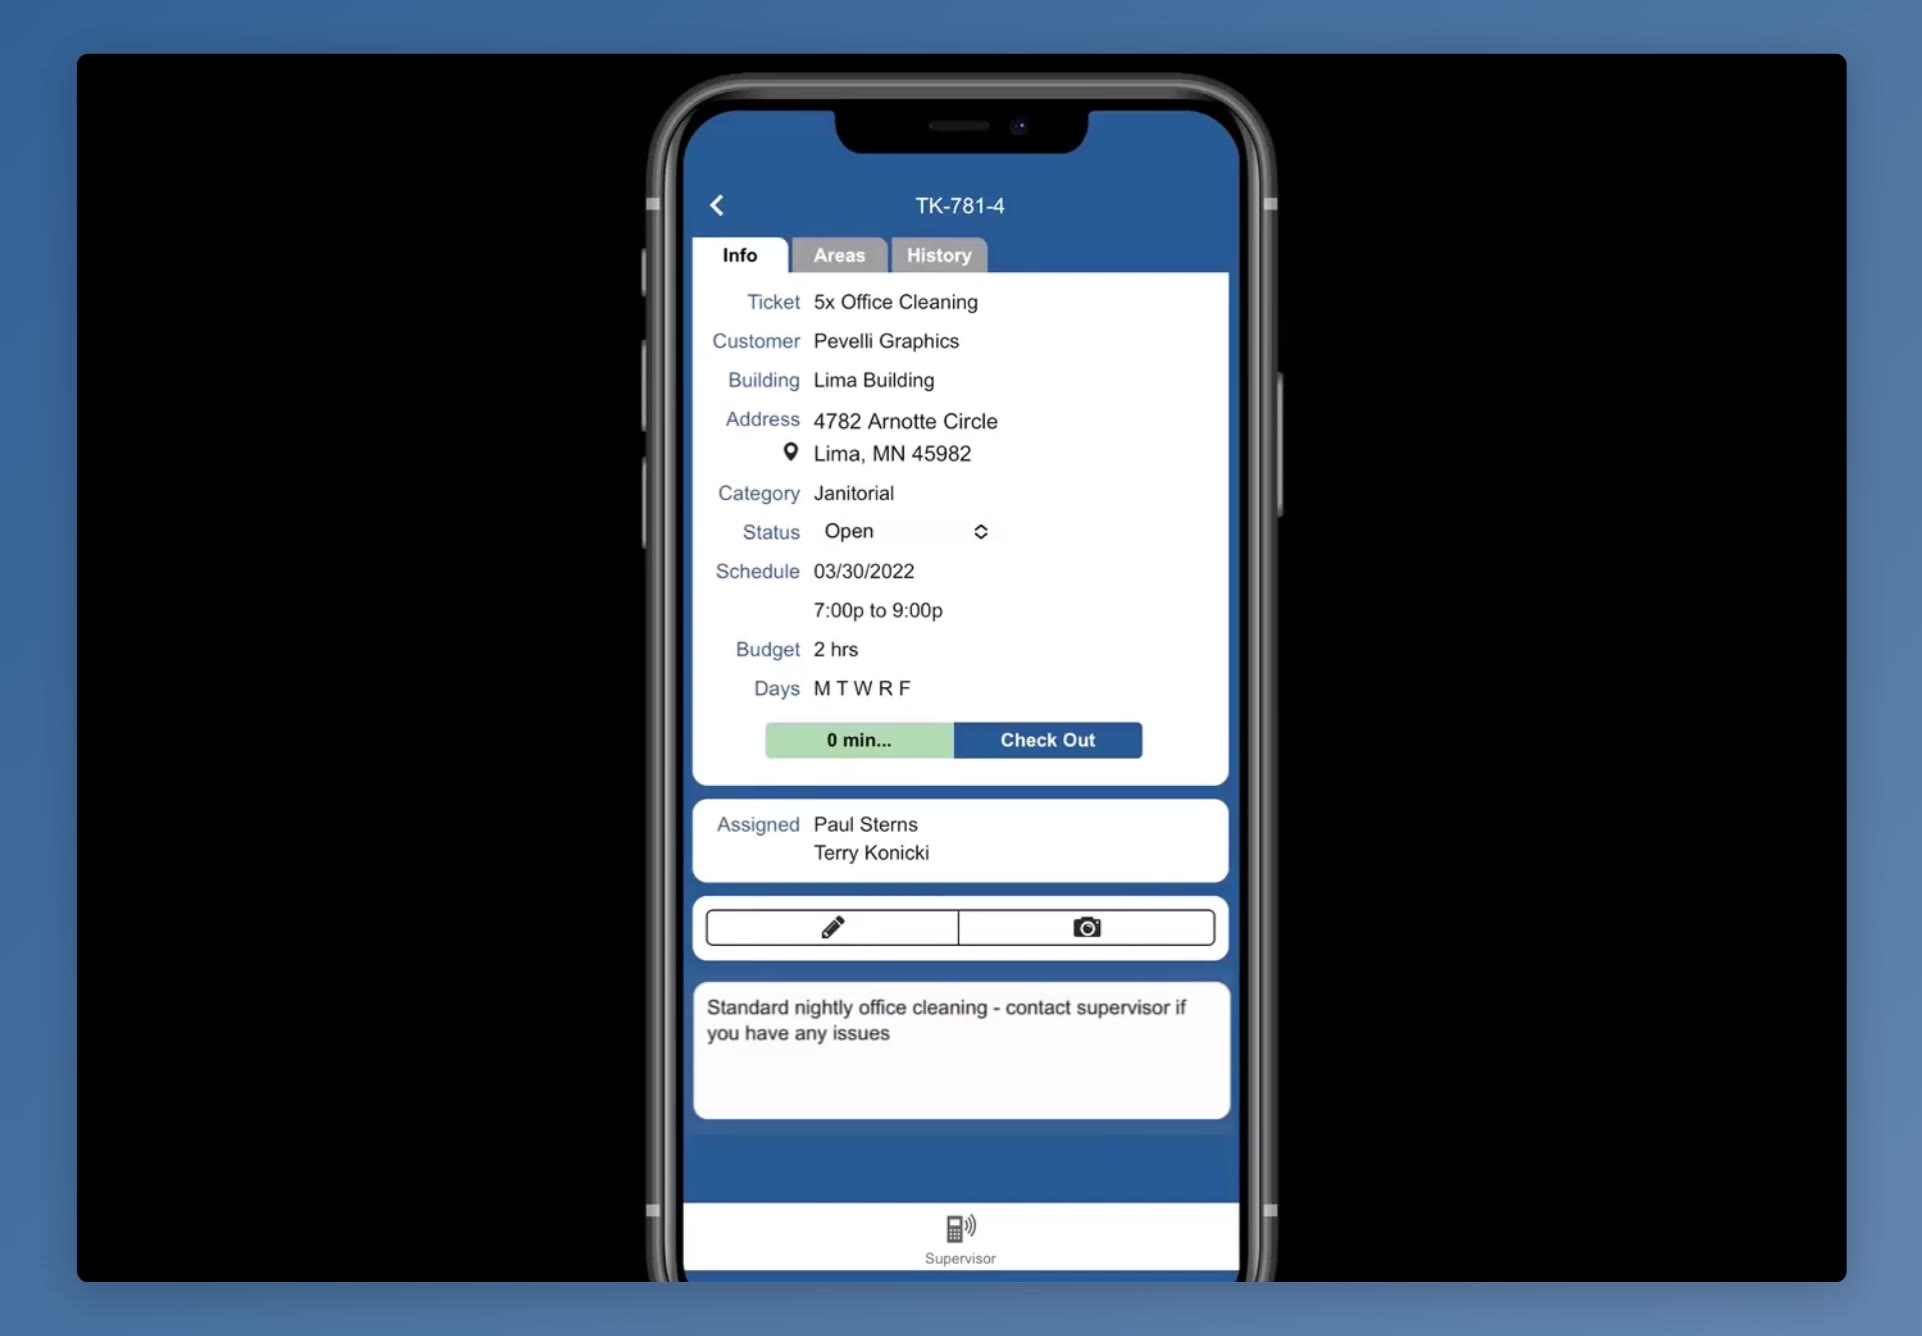
Reach your supervisor
Scroll to the bottom of the ticket screen and tap Supervisor. The app shows your supervisor’s name and number with Call and Text buttons.
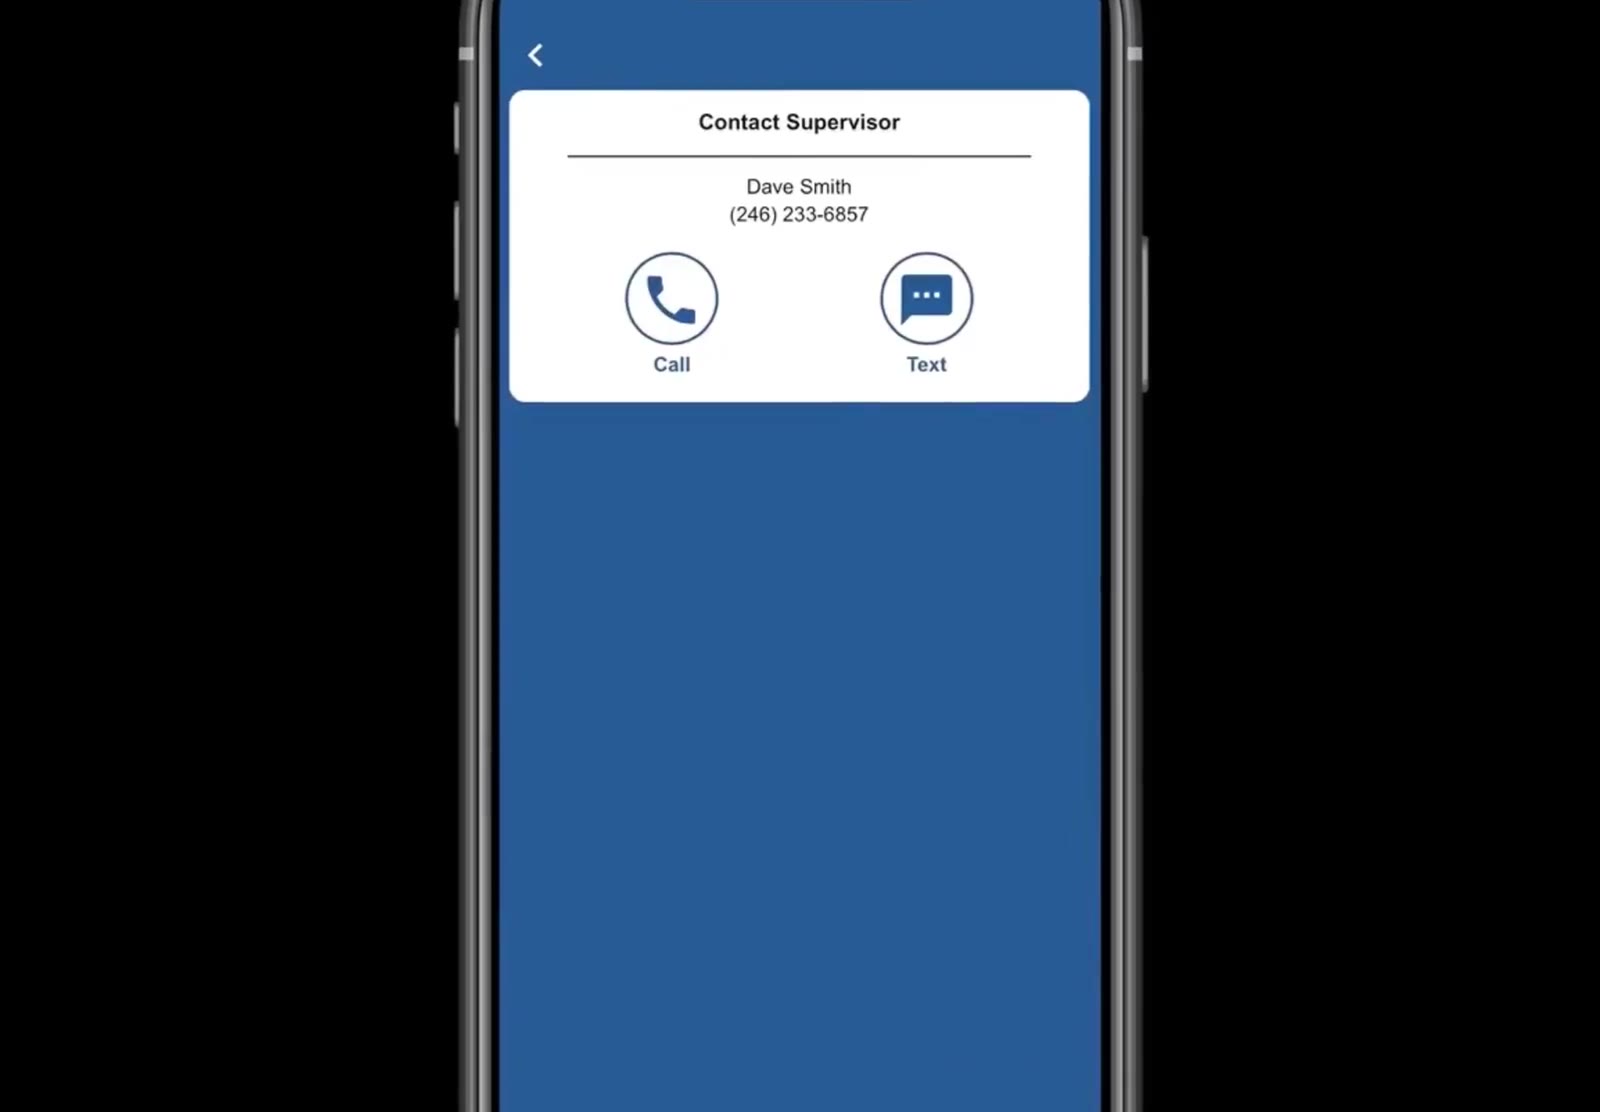
Use Text for anything that is not urgent, or to send a quick photo of what you are looking at.
Moving to Your Next Ticket
A day often holds more than one ticket. Finish one before you start the next so the hours land against the right job.
Return to your schedule
Tap back to the day’s list. The ticket you finished is now ticked, and your clock status reads ON for as long as you are on the clock.
Check in to the next ticket
Open it and tap Check In. If you left the previous ticket without saying whether it was finished, the app asks about it here.
Used this way, the app keeps every hour attached to the ticket it belongs to, which is what makes payroll and job costing come out right. Check in when you arrive, check out when you leave, and use GENERAL or TRAVEL for the time in between.